About Me
My hobbies are PSP.
I love helping my friends who are starting with PSP.
Any similarity or resemblance to any other tutorial is purely coincidental and unintentional. Pls do not recopy my tutorials anywhere. Many thanks Susan.


Credit

Blinkie created by Rabid Designz. She does some amazing work ! Thanks so much Melissa.

Blinkie created by my long time friend tweety here. Thanks so much my friend :)
My blog was designed By Alika's Scraps. Thanks so much. You did an amazing job !

Friday, April 30, 2010
 NSD Sales Sales & Sales at Just4Taggers !
11:12 PM | Posted by
Shal |
 Edit Post

Addicted to Rac PTU Scrap Kit
4:31 PM | Posted by
Shal |
Edit Post

Addicted to Rac PTU Scrap Kit
This kit contains 25 papers and 90 elements. Elements include various beauty products, bows, candles, corsets, doodles, flairs, frames, heart key chain, ribbons, roses, trinket boxes and word art. It's the perfect kit to show off your addiction to Rac !!!
Currently available at Scrappin Warehouse, The Creativity Box, Wilma4ever & Your Scrap Addiction.
Sunday, April 25, 2010
Daydreamer Tut
8:44 PM | Posted by
Shal |
Edit Post

Feel free to use my tutorial as a guide and
have fun giving it your own spin.
This tutorial assumes you have a working knowledge of PSP.
Needed Supplies & Filters :
Tube of Choice .. I am using the work of Angela Newman which you must have a license to use. Please do not use her work without purchasing through MPT here. I am licensed through Artistic Minds Inc. but they are now closed.
Scrap Kit of Choice .. I have used a gorgeous PTU kit from KatNKDA called Rose Red, which is currently unavailable as it was purchased through Artistic Minds Inc. which is now closed.
Mask of Choice .. I have used WSL_Mask81 from Weescotslass which can be downloaded here.
Word Art of Choice .. I have used word art 16 from Missy which can be downloaded here.
Font of Choice .. I am using Levenim MT.
Let's get started !
New image 600x600 and floodfill with white. New raster layer, select all, paste into selection Paper 7. New mask layer from image, WSL_Mask81, invert mask data unchecked, and merge group. Resize 110%.
Copy and paste Element 7, resize 65% and drop shadow. I have used 2/2/40/4 throughout.
Copy and paste Element 4 & resize 75%. Using your magic wand, select the center portion of both frames, selections modify/expand 5. Copy and paste Paper 10, resize 65%) below your frame layer, selections invert and hit delete. Select none. Drop shadow your frame.
Copy and paste Element 21, resize 40% & then 75%. Add drop shadow. Position at the bottom of your frame.
Copy and paste Element 42, resize 65% & drop shadow. Position on the left side of your frame. Copy and paste Element 16, resize 40% & drop shadow. Position on the left side. Copy and paste Element 22, resize 50% twice, mirror & drop shadow. Position on top of your leaves. Copy and paste Element 24, resize 40% twice & drop shadow. Position on your other flowers. Copy and paste Element 3, resize 30% & drop shadow. Position on the stems of your other flowers.
Copy and paste Element 26, resize 40% twice, rotate left 10 & drop shadow. Position top left hand corner.
Copy and paste Element 38, resize 40% & drop shadow. Position bottom right corner. Layer duplicate & rotate right 90. Position along the right hand side of your frame.
Copy and paste your tube and drop shadow.
X out white background, merge visible. Open white background, resize to your liking (I have used 500x500).
Copy and paste your word art and resize 85%. I have changed the color of the "Dreamer" part of the word art from #c0c0c0 to #701114. I then added the following gradient glow and drop shadow.

Add copyright and your name. I have used Levenim MT Size 60 color #701114. Add remove noise/gaussian & mono checked/75%. I then added the same gradient glow and drop shadow as before.
Save and you are done.
I hope you have enjoyed my tutorial. Pls feel free to experiment and use my tutorial as a guide.
Please feel free to send me your results. I'd love to see what you came up with.
Saturday, April 24, 2010
Call of the Wild Part 2 - The Wolf Pack Tut
10:36 PM | Posted by
Shal |
Edit Post

Feel free to use my tutorial as a guide and have fun giving it your own spin.
This tutorial assumes you have a working knowledge of PSP.
Needed Supplies & Filters :
Tube of Choice .. I am using the work of Sandi Baker which you must have a license to use. Please do not use her work without purchasing through My Tag Art here.
Scrap Kit of Choice .. I have used a gorgeous PTU Kit from Cora called Jacob which can be purchased here.
Mask of Choice .. I haved used WSL_Mask81 Weescotslass which can be downloaded here.
Font of Choice .. Machia.
Pls note since I originally had the full size version of this kit, I have opted to tell you how I resized by pixel size rather than %. This should allow you to work with either the tagger size or full size version of this kit.
Let's get started
New image 600x600 and floodfill with white. New raster layer, select all, paste into selection Paper 3. New mask layer from image, WSL_Mask81, invert mask data unchecked, and merge group. Resize 110%.
Copy and paste Twine (resized to 500 width). Add drop shadow. I have used 2/2/40/4 throughout. Position top right corner. Layer duplicate, mirror & flip.
Copy and paste String 1 (resized to 500 height). Add drop shadow. Position top right corner. Layer duplicate, mirror & flip.
Copy and paste Greens 5 (resized to 500 height). Add drop shadow & flip. Position bottom right hand corner. Layer duplicate & mirror.
Copy and paste Greens 7 (resized to 500 width). Add drop shadow. Position bottom right hand corner.
Copy and paste Greens 1 (resized to 500 width). Add drop shadow. Position bottom left hand corner.
Copy and paste Frame 6 (resized to 300 width). Position top left hand corner. Layer duplicate and rotate right 90. Position bottom right hand corner.
Rotate the top left hand corner frame left 15.
Using your magic wand, select the center portion of your top frame, selections modify/expand 5. Copy and paste Paper 12 (resized to 600 width) below your frame layer, selections invert and hit delete. Copy and paste your first tube (resized to your liking) and hit delete. Select none. Change blend mode of your tube layer to luminance.
Working on your bottom right hand corner frame, using your magic wand, select the center portion of your frame, selections modify/expand 5. Copy and paste Paper 12 (resized to 600 width) below your frame layer, selections invert and hit delete. Copy and paste your first tube (resized to your liking) and hit delete. Select none.
Drop shadow both frames.
Copy and paste Greens 6 (resized to 450 height). Add drop shadow. Position right hand side.
Copy and paste Paw print (resized to 185 width). Rotate left 25 and drop shadow. Position bottom left hand corner. Layer duplicate, resize 75% & mirror. Position bottom right hand corner of your bottom frame.
Copy and paste Thread (resized to 450 height). Add drop shadow. Position hanging from the top left hand corner of your top frame.
Copy and paste Tag (resized to 285 height). Rotate left 100 and add drop shadow. Position top right hand corner.
X out white background, merge visible. Open white background, resize to your liking (I have used 500x500).

I added some word art using Machia size 48 color #2b1804 and then added the following gradient glow and drop shadow.
Add copyright and your name. I have used Machine Size 30 color #2b1804 and positioned on my tag.
Save and you are done.
I hope you have enjoyed my tutorial. Pls feel free to experiment and use my tutorial as a guide.
Please feel free to send me your results. I'd love to see what you came up with.
Friday, April 23, 2010
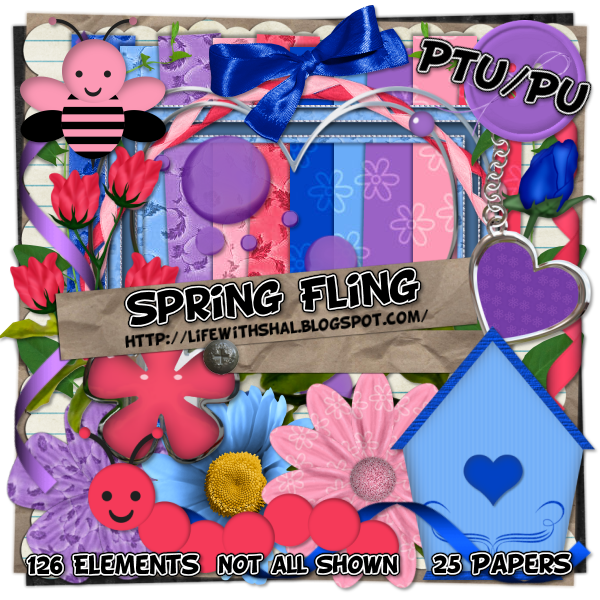
Spring Fling PTU Scrap Kit
10:58 PM | Posted by
Shal |
Edit Post

Spring Fling PTU Scrap Kit
This flowery spring themed kit has 25 papers & 126 elements. Elements include oodles of different flowers, bees, caterpillars, bird houses, bows, bubbles, buttons, doodles, flairs, frames, heart key chains & ribbons ! If you love spring, flowers and vibrant colors, this is the kit for you !
Currently available at My Tag Art, Scrappin Warehouse, The Creativity Box, Wilma4ever & Your Scrap Addiction.
Monday, April 19, 2010
Tut using my Ole Scrap Kit
4:21 PM | Posted by
Shal |
Edit Post

My dear friend tweety wrote this adorable tutorial using my Ole scrap kit ! I just love it and isn't it just perfect to celebrate Cinco de Mayo. You can find her tutorial here. Thanks so much my friend.
Saturday, April 17, 2010
Call of the Wild Tut
11:14 PM | Posted by
Shal |
Edit Post

Feel free to use my tutorial as a guide and have fun giving it your own spin.
This tutorial assumes you have a working knowledge of PSP.
Needed Supplies & Filters :
Tube of Choice .. I am using the work of Sandi Baker which you must have a license to use. Please do not use her work without purchasing through My Tag Art here.
Scrap Kit of Choice .. I have used a gorgeous PTU Kit from Heartbeatz Creationz called Introducing Jacob Black which can be purchased through her blog here.
Mask of Choice .. I haved used WSL_Mask83 Weescotslass which can be downloaded here.
Font of Choice .. Ank.
Let's get started
New image 600x600 and floodfill with white. New raster layer, select all, paste into selection Paper 20. New mask layer from image, WSL_Mask83, invert mask data unchecked, and merge group. Resize 110%.
New raster layer, select all, paste into selection Paper 9. New mask layer from image, WSL_Mask83, invert mask data unchecked, and merge group. Image mirror, resize 85% and rotate right 15.
Copy and paste Element 10 & position top right hand corner. Layer duplicate, mirror & flip. Drop shadow both layers. I have used 2/2/40/4 throughout.
Copy and paste Element 9, resize 75% & drop shadow. Position bottom left hand corner. Layer duplicate, mirror & flip.
Copy and paste Element 8 & resize 50%. Position top left hand corner. Layer duplicate and position bottom right hand side.
Working on the top frame, rotate left 15. Using your magic wand, select the center portion of your top frame, selections modify/expand 5. Copy and paste Paper 15 below your frame layer, resize 65%, selections invert and hit delete. Copy and paste your first tube and hit delete. Select none.
Working on the bottom frame, using your magic wand, select the center portion of your bottom frame, selections modify/expand 5. Copy and paste Paper 13 below your frame layer, resize 65%, selections invert and hit delete. Copy and paste your second tube and hit delete. Select none.
Drop shadow both frames.
Copy and paste Element 18, resize 65% & drop shadow. Position bottom centre. Copy and paste Element 14, resize 50% & drop shadow. Position bottom left hand corner.
Copy and paste Element 33, resize 50% & drop shadow. Position top right corner.
Copy and paste Element 35, resize 65% & drop shadow. Position bottom left hand corner of bottom frame. Copy and paste Element 40, resize 65% & drop shadow. Position hanging from top left corner of bottom frame.
Copy and paste Element 41, resize 65% & drop shadow. Position top left hand corner of top frame.
Copy and paste Element 39 & drop shadow. Position right hand corner of bottom frame.
X out white background, merge visible. Open white background, resize to your liking (I have used 500x500).
Add copyright and your name. I have used Ank Size 30 for word art and Size 48 for name color #872020. I then added the following gradient glow and drop shadow.

Save and you are done.
I hope you have enjoyed my tutorial. Pls feel free to experiment and use my tutorial as a guide.
Please feel free to send me your results. I'd love to see what you came up with.
Must Be Love Tut
4:10 PM | Posted by
Shal |
Edit Post

Feel free to use my tutorial as a guide and have fun giving it your own spin.
This tutorial assumes you have a working knowledge of PSP.
Needed Supplies & Filters :
Scrap Kit of Choice .. I have used a gorgeous PTU Kit from Monti called Darker Side of Love which can be purchased at Artistic Minds Inc. here.
Mask of Choice .. I haved used WSL_Mask84 Weescotslass which can be downloaded here.
Font of Choice .. I am using Gwendolyn Bold
Let's get started
New image 600x600 and floodfill with white. New raster layer, select all, paste into selection Paper-RosePetals-Black. New mask layer from image, WSL_Mask84, invert mask data unchecked, and merge group. Resize 105%.
New raster layer, select all, paste into selection Paper 9. New mask layer from image, WSL_Mask83, invert mask data unchecked, and merge group. Image mirror, resize 85% and rotate right 15.
Copy and paste Frame-CircleHeart-Red and resize 80%.
Copy and paste Heart-RedGlitter, resize 65% & drop shadow. I have used 2/2/40/4 throughout. Position top left hand corner. Copy and paste Heart-Diamond, resize 65% & drop shadow. Position next to your other heart.
Copy and paste Frame-CircleHeart-Black and resize 70%.
Using your magic wand, select the center portion of your top frame, selections modify/expand 5. Copy and paste Paper-Hearts3-Red below your frame layer, resize 80%, selections invert and hit delete.
Copy and paste below your frame your tube. Layer duplicate and drag this layer above your frame. On the tube layer below you frame, hit delete. Select none. Select the tube layer above your frame and erase the bottom portion of the tube so it appears to be coming out of your frame. Select none.
Drop shadow both frames.
Copy and paste RosePetals-Edge, resize 65% & drop shadow. Position bottom right hand corner.
Copy and paste HeartandBow-Black, resize 50% & drop shadow. Position on the left hand side of your top frame towards the top. Layer duplicate and move down a bit.
Copy and paste Bow-RedBlack.png, resize 50% & drop shadow. Position on your left hand side bow and then duplicate and position on your other bow.
Copy and paste Heart-RedBlack, resize 30% & drop shadow. Position on your left hand side bows and then duplicate and position on your other bows.
Copy and paste WordArt-MustBeLove & resize 65%. I then added the following gradient glow and then drop shadow. Position top right hand side.
This tutorial assumes you have a working knowledge of PSP.
Needed Supplies & Filters :
Tube of Choice .. I am using the work of Ismael Rac which you must have a license to use. I am licensed through Artistic Minds Inc. but they are now closed. You can now find Ismael's artwork licensed through his own store. Pls do not use his work without purchasing through here.
Scrap Kit of Choice .. I have used a gorgeous PTU Kit from Monti called Darker Side of Love which can be purchased at Artistic Minds Inc. here.
Mask of Choice .. I haved used WSL_Mask84 Weescotslass which can be downloaded here.
Font of Choice .. I am using Gwendolyn Bold
Let's get started
New image 600x600 and floodfill with white. New raster layer, select all, paste into selection Paper-RosePetals-Black. New mask layer from image, WSL_Mask84, invert mask data unchecked, and merge group. Resize 105%.
New raster layer, select all, paste into selection Paper 9. New mask layer from image, WSL_Mask83, invert mask data unchecked, and merge group. Image mirror, resize 85% and rotate right 15.
Copy and paste Frame-CircleHeart-Red and resize 80%.
Copy and paste Heart-RedGlitter, resize 65% & drop shadow. I have used 2/2/40/4 throughout. Position top left hand corner. Copy and paste Heart-Diamond, resize 65% & drop shadow. Position next to your other heart.
Copy and paste Frame-CircleHeart-Black and resize 70%.
Using your magic wand, select the center portion of your top frame, selections modify/expand 5. Copy and paste Paper-Hearts3-Red below your frame layer, resize 80%, selections invert and hit delete.
Copy and paste below your frame your tube. Layer duplicate and drag this layer above your frame. On the tube layer below you frame, hit delete. Select none. Select the tube layer above your frame and erase the bottom portion of the tube so it appears to be coming out of your frame. Select none.
Drop shadow both frames.
Copy and paste RosePetals-Edge, resize 65% & drop shadow. Position bottom right hand corner.
Copy and paste HeartandBow-Black, resize 50% & drop shadow. Position on the left hand side of your top frame towards the top. Layer duplicate and move down a bit.
Copy and paste Bow-RedBlack.png, resize 50% & drop shadow. Position on your left hand side bow and then duplicate and position on your other bow.
Copy and paste Heart-RedBlack, resize 30% & drop shadow. Position on your left hand side bows and then duplicate and position on your other bows.
Copy and paste WordArt-MustBeLove & resize 65%. I then added the following gradient glow and then drop shadow. Position top right hand side.

X out white background, merge visible. Open white background, resize to your liking (I have used 500x500).
Add copyright and your name. I have used Gwendolyn Bold size 72 color #872020. I then added the a lil noise effect .. adjust/add remove noise/uniform & monochrome checked/50 and then the same gradient glow and drop shadow as before.
Save and you are done.
I hope you have enjoyed my tutorial. Pls feel free to experiment and use my tutorial as a guide.
Please feel free to send me your results. I'd love to see what you came up with.
Tree of Love Tut
2:29 PM | Posted by
Shal |
Edit Post
Feel free to use my tutorial as a guide and have fun giving it your own spin.
This tutorial assumes you have a working knowledge of PSP.
Needed Supplies & Filters :
Tube of Choice .. I am using the work of KatNKDA which you must have a license to use. Please do not use her work without purchasing through her store here. I am licensed through Artistic Minds Inc. but they are now closed.
Template of Choice .. I have used template 79 by Ali which can be downloaded from her blog here.
Mask of Choice .. I haved used WSL_Mask84 Weescotslass which can be downloaded here.
Font of Choice .. Gwendolyn Bold
Filters of Choice .. Xenofex/Constellation & DSB Flux/Bright Noise
This tutorial assumes you have a working knowledge of PSP.
Needed Supplies & Filters :
Tube of Choice .. I am using the work of KatNKDA which you must have a license to use. Please do not use her work without purchasing through her store here. I am licensed through Artistic Minds Inc. but they are now closed.
Scrap Kit of Choice .. I have used a gorgeous PTU Kit from KatNKDA called Tree of Love which was purchased through Artistic Minds Inc. who are now closed. The art kit version of this kit can now be purchased here.
Template of Choice .. I have used template 79 by Ali which can be downloaded from her blog here.
Mask of Choice .. I haved used WSL_Mask84 Weescotslass which can be downloaded here.
Font of Choice .. Gwendolyn Bold
Filters of Choice .. Xenofex/Constellation & DSB Flux/Bright Noise
Let's get started
Open your template in PSP. Delete credits. New raster layer, send to bottom and floodfill with white. Adjust canvas size 650x650.
New raster layer, select all, paste into selection Paper 14. New mask layer from image, WSL_Mask84, invert mask data unchecked, and merge group. Layer duplicate & merge down. If necessary, enlarge your mask layer 105-110%.
Select Circle layer, select all/float/defloat, copy and paste Paper 8, resize 75%, selections invert & hit delete. Delete original Circle layer.
Copy and paste Element 19 & resize 65%. Duplicate layer twice & rename Circle 1, 2 & 3. On your first circle layer apply the following Constellation.

Apply the same Constellation to your next Circle layer and hit random once. Apply again to your last Circle layer hitting random twice. Select none. If you decide not to animate your tag, then just skip the duplicate twice.
Merge down Shape 2-3-4 layers. Select all/float/defloat, copy and paste Paper 1, resize 75%, selections invert & hit delete. Delete original merged layer. I then added a size 5 fat white gradient glow and then drop shadow. I have used 2/2/40/4 throughout.
Copy and paste Element 41, resize 60% & drop shadow.
Select Shape 1 layer, select all/float/defloat, copy and paste your image, selections invert & hit delete. Delete original Shape 1 layer.
Select Frame layer, select all/float/defloat, new raster layer and floodfill with #d0818e. Delete original Frame layer.
Duplicate Frame layer twice and rename Frame 1-2-3. On your first layer apply DSB Flux/Bright Noise 40%. On your 2nd layer, apply bright noise again, hitting mix twice. On your 3rd layer, apply again hitting mix 3 times. Again, if you decide not to animate your tag, then just skip this part of the tutorial.
Add drop shadow to all 3 frame layers.
Copy and paste Element 1, resize 40% & drop shadow. Position bottom left hand corner of your frame. Copy and paste Element 3, resize 30% & drop shadow. Position next to your other rose.
Copy and paste below your rose layers Element 36, resize 40%, mirror & drop shadow. Layer duplicate & rotate right 90.
Copy and paste Element 32, resize 40% & drop shadow. Position bottom right hand corner of your frame.
Copy and paste Element 30, resize 40% & drop shadow. Position top right hand corner of your frame.
Copy and paste Element 42, resize 25% & drop shadow. Position the bird sitting on your roses.
At this point if you need to, resize your tag. I have used 500x500. Add your copyright and name. I have used Gwendolyn bold size 48 color #d0818e and added a size 3 fat white gradient glow and then drop shadow.
If you are choosing not to animate, then you can save your tag.
To animate, close off Circle & Frame Layers 2 & 3 (the lil eye icon in your layer palette), Edit/Copy Merged and paste as new animation in Animation Shop. Close off Circle & Frame Layers 1 and open Circle & Frame Layers 2, Edit/Copy Merged and paste after current frame in AS. Close off Circle & Frame Layers 2 and open Circle & Frame Layers 3, Edit/Copy Merged and paste after current frame in AS.
Save as a gif.
I hope you have enjoyed my tutorial.
Pls feel free to experiment and use my tutorial as a guide.
Please feel free to send me your results.
I'd love to see what you came up with.
Treasure Hunt at Just4Taggers
1:48 AM | Posted by
Shal |
Edit Post

Arr, Land Lubbers, Thar be a Treasure Hunt @ Just4Taggers
Ye scrappy wenches have hidden scrapping gold somewhere
Inside the store, so stop by n' snag ye clues!!
Treasure & Clues will be posted in store from
15th April 2010 to 30th April 2010!!
Once you found the treasure you download it FREE!!
Clues can be found here.
Ye scrappy wenches have hidden scrapping gold somewhere
Inside the store, so stop by n' snag ye clues!!
Treasure & Clues will be posted in store from
15th April 2010 to 30th April 2010!!
Once you found the treasure you download it FREE!!
Clues can be found here.
News News News !!!
1:31 AM | Posted by
Shal |
Edit Post

I'm pleased to announce that my items are now available at My Tag Art ! If you haven't made your way there, you really need to ! It's a wonderful place ! Coming soon will be some exclusive Tagger kits .. only available there !
Currently available there are 2 PTU Tagger sized kits as well as 2 of my freebies !
Ole PTU Kit

This Mexico/Cinco de Mayo themed kit has 26 papers, 86 elements & a glass alpha.
It is currently available here.
On The Wings of Love PTU Kit

This love themed kit has 30 papers & 85 elements.
It is available here.
Love FTU Mini Kit

This FTU kit has 14 elements, 4 papers and a heart shaped alpha.
You can download it at My Tag Art here.
St-Paddy's FTU Mini Kit

This FTU kit has 36 elements & 12 papers.
You can download it at My Tag Art here.
Tuesday, April 13, 2010
Ole PTU Scrap Kit
2:07 PM | Posted by
Shal |
Edit Post

Ole PTU Scrap Kit
This Mexico/Cinco de Mayo themed kit has 26 papers, 86 elements & a glass alpha.
Currently available at My Tag Art, Scrappin Warehouse, The Creativity Box, Wilma4ever & Your Scrap Addiction.

Butterfly Dreams Tut
1:35 PM | Posted by
Shal |
Edit Post

Feel free to use my tutorial as a guide and have fun giving it your own spin.
This tutorial assumes you have a working knowledge of PSP.
Needed Supplies & Filters :
Tube of Choice .. I am using the work of Terry Heuser which you must have a license to use. Please do not use her work without purchasing through My Tag Art here.
Scrap Kit of Choice .. I have used a gorgeous PTU Kit from Country Style Designs called Butterfly Song which can be purchased here.
Template of Choice .. I have used template 64 by Ali which can be downloaded from her blog here.
Mask of Choice .. I haved used WSL_Mask83 Weescotslass which can be downloaded here.
Word Art of Choise .. I have used Word Art by Lori which can be downloaded from her blog here.
Font of Choice .. Grape Nuts Rob.
Let's get started
Open your template in PSP. Delete credits. New raster layer, send to bottom and floodfill with white. Adjust canvas size 682x599.
New raster layer, select all, paste into selection Paper 4. New mask layer from image, WSL_Mask83, invert mask data unchecked, and merge group. Resize 110%.
Select Shape layer 3, select all/float/defloat, copy and paste Paper 3, selections invert & hit delete. Delete original Shape layer 3. Add drop shadow. I have used 2/2/40/4 throughout.
Select Shape layer 2, select all/float/defloat, copy and paste Paper 12, selections invert & hit delete. Delete original Shape layer 2. Add drop shadow. Repeat with Shape layer 1.
Copy and paste Flower 1 & drop shadow. Position top right hand corner. Layer duplicate, image rotae left 45 & image flip. Position bottom left hand side.
Select Frame layer 2, select all/float/defloat, copy and paste your image, selections invert & hit delete. Delete original Frame layer 2. Add the following gradient glow and then drop shadow.

Select Frame layer 1, select all/float/defloat, new raster layer & floodfill with #3c331c. Copy and paste your tube, selections invert & hit delete. Delete original Frame layer 1. Merge down your background and tube and add the same gradient glow as before and then drop shadow.
Copy and paste Butterfly 2, resize 75% & drop shadow. Position top right. Copy and paste Butterfly 1, resize 75% & drop shadow. Position bottom left.
Copy and paste String 1, resize 50% & drop shadow. Position bottom right corner. Copy and paste Mushroom 1, resize 50% & drop shadow. Position bottom right corner.
X out white background, merge visible. Open white background, resize to your liking (I used a width of 550).
Copy and paste Word Art & resize 65%. I then a size 3 fat color #b7ad97 gradient glow and then drop shadow. Position top right hand corner.
Add copyright and your name. I have used Grape Nuts Rob Size 72 color #e18216 & then added the following gradient glow and drop shadow.

Save and you are done.
I hope you have enjoyed my tutorial. Pls feel free to experiment and use my tutorial as a guide.
Please feel free to send me your results. I'd love to see what you came up with.
Monday, April 12, 2010
Addicted to Rac Collaboration
7:53 PM | Posted by
Shal |
Edit Post

Feel free to use my tutorial as a guide and have fun giving it your own spin.
This tutorial assumes you have a working knowledge of PSP.
Needed Supplies & Filters :
Tube of Choice .. I am using the work of Ismael Rac which you must have a license to use. I am licensed through Artistic Minds Inc. but they are now closed. You can now find Ismael's artwork licensed through his own store. Pls do not use his work without purchasing through here.
Scrap Kit of Choice .. I have used a gorgeous PTU Kit from Creative Intentionz called Addicted to Rac. This kit is part of a collaboration at Just4Taggers and is currently available for free when you purchase 10.00$ worth of products at the store here.
Mask of Choice .. I haved used WSL_Mask83 Weescotslass which can be downloaded here.
Font of Choice .. I am using Mama Script
Let's get started
New image 600x600 and floodfill with white. New raster layer, select all, paste into selection Paper 7. New mask layer from image, WSL_Mask83, invert mask data unchecked, and merge group.
New raster layer, select all, paste into selection Paper 9. New mask layer from image, WSL_Mask83, invert mask data unchecked, and merge group. Image mirror, resize 85% and rotate right 15.
Copy and paste Frame 1, resize 75%, rotate left 25 & drop shadow. I have used 2/2/40/4 throughout.
Copy and paste Frame 4 & resize 65%. Using your magic wand, select the center portion of both your frames, selections modify/expand 5. Copy and paste Paper 12 below your frame layer, resize 75%, selections invert and hit delete. Copy and paste your chosen tubes in each window and hit delete. Select none & drop shadow your frame.
Copy and paste Flower arrangement 2, resize 40%, image flip, rotate left 25 & drop shadow. Position top left hand corner of your frame.
Copy and paste Bead string 2 just below your flower layer, resize 50%, rotate right 90 & drop shadow. Position hanging from beanth the flowers. Layer duplicate and move over a bit.
Copy and paste Rose 3, resize 50%, image mirror, rotate right 90 & drop shadow. Position on the bottom of your right hand side frame.
X out white background, merge visible. Open white background, resize to your liking (I have used 500x500).
Add copyright and your name. I have used Mama Script size 72 with Paper 12 as my background in my materials palette. I then added the following gradient glow and drop shadow.

Save and you are done.
I hope you have enjoyed my tutorial. Pls feel free to experiment and use my tutorial as a guide.
Please feel free to send me your results. I'd love to see what you came up with.
Saturday, April 10, 2010
Tuts using my part of the Addicted to Rac Collaboration at Just 4 Taggers
7:43 PM | Posted by
Shal |
Edit Post

My dear friend tweety wrote this great tutorial using my part of the Addicted to Rac collaboration !
I just love what you always do with my kits.
Thanks so much my friend ! The tutorial can be found here.
I just love what you always do with my kits.
Thanks so much my friend ! The tutorial can be found here.

Tina from Tina's Magical World wrote this gorgeous tutorial also using my part of the Addicted to Rac collaboration ! Amazing job .. I just love what you did with it !!! The tutorial can be found here.
Thanks so much ladies !!!
Don't forget .. there is still time to get into this great collaboration for free when you purchase 10.00$ worth of goodies at Just4Taggers.
Monday, April 5, 2010
Spring Fairies Tut
4:08 PM | Posted by
Shal |
Edit Post

Feel free to use my tutorial as a guide and have fun giving it your own spin.
This tutorial assumes you have a working knowledge of PSP.
Needed Supplies & Filters :
Tube of Choice .. I am using the work of Caron Vinson which you must have a license to use. Please do not use her work without purchasing through CILM here.
Scrap Kit of Choice .. I have used a gorgeous PTU Kit from Created by Jill called A Spring Garden which can be purchased here.
Template of Choice .. I have used template 77 by Ali which can be downloaded from her blog here.
Mask of Choice .. I have used zuzzanna_mask05 from Zuzzanna which can be downloaded here.
Font of Choice .. Gwendolyn Bold.
Let's get started
Open your template in PSP. Delete credits. New raster layer, send to bottom and floodfill with white.
New raster layer, select all, paste into selection Paper 2. New mask layer from image, zuzzanna_mask05, invert mask data unchecked, and merge group.
Select Back Shape layer 4, select all/float/defloat, copy and paste Paper 6, resize 75%, selections invert & hit delete. Delete original Back Shape layer 4.
Repeat for Back Shape layer 3 with Paper 4, Back Shape layer 2 with Paper 6 and Back Shape layer 1 with Paper 4. Drop shadow each layer. I have used 2/2/40/4 throughout.
Select Black Middle Box layer, select all/float/defloat, copy and paste Paper 8, selections invert & hit delete. Delete original Black Middle Box layer.
Copy and paste Leaves 1, drop shadow & position top left hand side. Layer duplicate, mirror & flip. Position bottom right hand side. See my tag for placement.
Copy and paste Leaves 2, resize 75% & drop shadow. Position right hand side.
Copy and paste Ribbon 2, resize 75% & drop shadow. Position top left hand side. Copy and paste Ribbon 1, resize 75%, mirror and drop shadow. Position top right hand side. Copy and paste String 2, resize 85% & drop shadow. Position above your ribbons.
Select Shape 2 layer, select all/float/defloat, copy and paste Paper 7, selections invert & hit delete. Copy and paste your tube and hit delete. Select none and delete original Shape 2 layer. Repeat with Shape 1 layer.
Adjust/add remove noise/uniform & monochrome checked/75% & drop shadow. I have used 2/2/40/4 throughout.
Select Frame 2 layer, select all/float/defloat, new raster layer and floodfill with color #93cde7. Select none and delete original Frame 2 layer. Add remove noise/uniform & mono checked/75%. I then added a size 5 fat white gradient glow and drop shadow. Repeat with Frame layer 1.
Copy and paste Ribbon 1, resize 75% & drop shadow. Position bottom right hand side. Layer duplicate & mirror.
Copy and paste Bow 1, resize 50% & drop shadow. Position bottom centre. Copy and paste Bow 5, resize 35% & drop shadow. Position on your other bow. Copy and paste Button 2, resize 40% & drop shadow. Position on your bows.
Copy and paste Umbrella, resize 50% & drop shadow. Position bottom right hand corner. Copy and paste Watering can, resize 50% & drop shadow. Position bottom left hand corner.
Copy and paste above your mask layer Flat glitter, resize 70% & drop shadow. Position to the left, layer duplicate & mirror.
X out white background, merge visible. Open white background, resize to your liking (I used a width of 600).
Copy and paste Word Art, resize 85%, rotate right 25 and I added the same gradient glow and drop shadow as before.
Add copyright and your name. I have used Gwendolyn Bold Size 72 color #1587a1 & then added the same noise as before and the following gradient glow and then drop shadow.

Save and you are done.
I hope you have enjoyed my tutorial. Pls feel free to experiment and use my tutorial as a guide.
Please feel free to send me your results. I'd love to see what you came up with.
Subscribe to:
Posts (Atom)
Kits & Tuts


Blogs I Love


