About Me
My hobbies are PSP.
I love helping my friends who are starting with PSP.
Any similarity or resemblance to any other tutorial is purely coincidental and unintentional. Pls do not recopy my tutorials anywhere. Many thanks Susan.


Credit

Blinkie created by Rabid Designz. She does some amazing work ! Thanks so much Melissa.

Blinkie created by my long time friend tweety here. Thanks so much my friend :)
My blog was designed By Alika's Scraps. Thanks so much. You did an amazing job !

Monday, January 31, 2011
 Take That Tuesday at The Creativity Box !!!
11:31 PM | Posted by
Shal |
 Edit Post

Take That Tuesday at The Creativity Box where designs can be had for .99 !
All Shal's World designs are .99 !
Love Is Tut
4:29 PM | Posted by
Shal |
Edit Post

Feel free to use my tutorial as a guide and have fun giving it your own spin.
This tutorial assumes you have a working knowledge of PSP.
Needed Supplies & Filters :
Tube of Choice .. I am using the work of Jennifer Nilsson (http://www.jenniferlnilsson.com) which you must have a license to use. Please do not use her work without purchasing through My Tag Art here.
Scrap Kit of Choice .. I have used a gorgeous FTU scrap kit from Scraps Dimensions called "Sweet Valentine" which can be downloaded here.
Mask of Choice .. I haved used WSL_Mask160 by weescotslass which can be downloaded here.
Template of Choice .. I have used Template #4 also from Scraps Dimensions which can be downloaded here.
Font of Choice .. Pointed Brush
Let's get started
Open your template in PSP & delete credits. Floodfill your background layer with white.
New raster layer just above your background layer. Select all, copy and paste into selection Paper 2. Select none. New mask layer from image, WSL_Mask160, invert transparency unchecked. Merge group. Resize 120%.
Copy and paste Doodle, resize 85% & drop shadow. I have used 2/2/40/4 throughout. Position on the right hand side. Layer duplicate & resize 85%. Position a lil lower on the same side.
Select Raster 2 layer, select all/float/defloat, copy and paste Paper 6, selections invert and hit delete. Select none and delete original Raster 2 layer.
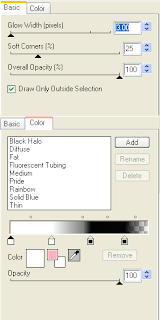
Add the following gradient glow & then drop shadow.
This tutorial assumes you have a working knowledge of PSP.
Needed Supplies & Filters :
Tube of Choice .. I am using the work of Jennifer Nilsson (http://www.jenniferlnilsson.com) which you must have a license to use. Please do not use her work without purchasing through My Tag Art here.
Scrap Kit of Choice .. I have used a gorgeous FTU scrap kit from Scraps Dimensions called "Sweet Valentine" which can be downloaded here.
Mask of Choice .. I haved used WSL_Mask160 by weescotslass which can be downloaded here.
Template of Choice .. I have used Template #4 also from Scraps Dimensions which can be downloaded here.
Font of Choice .. Pointed Brush
Let's get started
Open your template in PSP & delete credits. Floodfill your background layer with white.
New raster layer just above your background layer. Select all, copy and paste into selection Paper 2. Select none. New mask layer from image, WSL_Mask160, invert transparency unchecked. Merge group. Resize 120%.
Copy and paste Doodle, resize 85% & drop shadow. I have used 2/2/40/4 throughout. Position on the right hand side. Layer duplicate & resize 85%. Position a lil lower on the same side.
Select Raster 2 layer, select all/float/defloat, copy and paste Paper 6, selections invert and hit delete. Select none and delete original Raster 2 layer.
Add the following gradient glow & then drop shadow.

Select Raster 3 layer, select all/float/defloat, copy and paste Paper 10, selections invert and hit delete. Select none and delete original Raster 3 layer.
Select Raster 4 layer, select all/float/defloat, copy and paste Paper 5, selections invert and hit delete. Select none and delete original Raster 4 layer. Add drop shadow.
Select Raster 5 layer, select all/float/defloat, copy and paste Paper 2, selections invert and hit delete. Select none and delete original Raster 5 layer. Add drop shadow.
Select Raster 7 layer, select all/float/defloat, copy and paste Paper 9, selections invert and hit delete. Select none and delete original Raster 7 layer.
Select Raster 6 layer, select all/float/defloat, copy and paste Paper 8, selections invert and hit delete. Select none and delete original Raster 6 layer.
Select Raster 9 layer. Adjust color balance/manual color correction from black to #bd104a. Adjust/add remove noise/monochrome uniform checked/50%. Add the same gradient glow and drop shadow as before.
Select Raster 10 layer. Adjust color balance/manual color correction from dark gray to #ec5c8f. Adjust/add remove noise/monochrome random checked/50%. Add gradient glow and drop shadow.
Copy and paste branch, resize 85%, rotate left 15 & drop shadow. Position on the left hand side.
Copy and paste Heart 1, resize 40% & drop shadow. Position hanging from the rectangular frame.
Copy and paste your tube, resize 85%, mirror & drop shadow.
Copy and paste Envelope & resize 50%. Using your magic wand, select the center portion of the envelope frame, selections modify/expand 3. Copy and paste your image below your envelope frame layer, resize image as necessary, selections invert and hit delete. Select none.
Merge down the Envelope frame & image and then drop shadow. Rotate right 15 and position bottom right hand corner.
Copy and paste Valentine's Candy, resize 65% & drop shadow. Position bottom left hand corner.
X out white background, merge visible. Open white background, resize to your liking (I have used 500x500).
Add copyright and name on your tag. I have used Pointed Brush, Size 60, color #da2e67. I then added a noise effect (adjust/add remove noise/monochrome uniform checked/50%) and then added the same gradient glow & drop shadow as before.
Save and you are done.
For a lil extra twist, I added a bling to my finished tag.
The bling I have used is from KatNKDA's Member's group. Any bling will work, the only difference will be the amount of layers.
Open your bling & finished tag (.jpg with white background) in Animation shop. Check how many layers your bling has .. mine had 4 .. so you need to duplicate your tag until you have 4 layers also (edit/duplicate selected). Select your bling, select all & copy. Edit/propagate paste. Select your tag, select all, edit/paste into selection and position your bling on your tag where you would like it to be.
View animation to see if positioning is to your liking. If your bling has movement, you may have to undo and redo to position to where it flows well, or even resize your bling before starting. Save as gif.
I hope you have enjoyed my tutorial. Pls feel free to experiment and use my tutorial as a guide.
Please feel free to send me your results. I'd love to see what you came up with.
Please feel free to send me your results. I'd love to see what you came up with.

Sunday, January 30, 2011
Always Loved You Tut
4:47 PM | Posted by
Shal |
Edit Post

Feel free to use my tutorial as a guide and have fun giving it your own spin.
This tutorial assumes you have a working knowledge of PSP.
Needed Supplies & Filters :
Tube of Choice .. I am using the work of Joanne Schempp (http://schempp.us/) which you must have a license to use. Please do not use her work without purchasing through My Tag Art here.
Scrap Kit of Choice .. I have used my own PTU Scrap kit "Darker Side of Love" which can be purchased here.
Mask of Choice .. I haved used WSL_Mask223 by weescotslass which can be downloaded here.
Word art of Choice .. I have used word art by Eclectic Chaos which can be downloaded here.
Font of Choice .. Constanza
Let's get started
New image 600x600 and floodfill with white. New raster layer, select all, paste into selection Paper 7. Select none. New mask layer from image, Vix_Mask223, invert transparency unchecked, and merge group.
Copy and paste Splat 1, resize 50% & drop shadow. I have used 2/2/40/4 throughout. Position top right hand corner.
Layer duplicate and move down to bottom right hand corner.
Copy and paste Splat 2, resize 35% & drop shadow. Position next to your first black splat.
Layer duplicate and move down next to your 2nd black splat. Layer duplicate and position top right hand corner.
Copy and paste Frame 11, resize 85% & drop shadow.
Copy and paste Frame 9 & resize 80%. Using your magic wand, select the center portion of your frame, selections modify/expand 5. Copy and paste Paper 10 below your frame layer, selections invert and hit delete. Do not deselect.
Copy and paste below your frame your tube & resize 85%. Layer duplicate and drag this layer above your frame. On the tube layer below you frame, hit delete. Select none. Select the tube layer above your frame and erase the bottom portion of the tube so it appears to be coming out of your frame. Drop shadow your frame.
Copy and paste Dead Tree 1, resize 60% & drop shadow. Position bottom right hand corner. Layer duplicate, resize 65% & mirror.
Copy and paste Rose 1, resize 50% & drop shadow. Position bottom left hand corner.
Copy and paste Doodle 1, resize 75% & dropshadow. Position along the bottom. Copy and paste Ribbon 3, rotate left 45 & drop shadow. Position along the bottom.
Copy and paste Rose 3, resize 40% & drop shadow. Position next to your black rose. Copy and paste Bow 1, resize 50% & drop shadow. Position next to your roses. Copy and paste Rose 2, resize 40% & drop shadow. Position on your bow.
Copy and paste Goblet, resize 65% & drop shadow. Position bottom right hand corner. Copy and paste Candles 3, resize 40% & drop shadow. Position next to your goblet.
Copy and paste Heart 5, resize 50%, rotate right 15 & drop shadow. Position next to your candles.
Copy and paste Charm, resize 40% & drop shadow. Position top left hand corner. Copy and paste Bow 5, resize 30% & drop shadow. Position at the top of your charm.
Copy and paste your Word Art & resize 85%. I then added the following gradient glow and drop shadow.
X out white background, merge visible. Open white background, resize to your liking (I have used 500x500).
Add copyright and name on your tag. I have used Satanick, Size 48, color black and then added the same gradient glow & drop shadow as with the word art.
Save and you are done.
I hope you have enjoyed my tutorial. Pls feel free to experiment and use my tutorial as a guide.
Please feel free to send me your results. I'd love to see what you came up with.
This tutorial assumes you have a working knowledge of PSP.
Needed Supplies & Filters :
Tube of Choice .. I am using the work of Joanne Schempp (http://schempp.us/) which you must have a license to use. Please do not use her work without purchasing through My Tag Art here.
Scrap Kit of Choice .. I have used my own PTU Scrap kit "Darker Side of Love" which can be purchased here.
Mask of Choice .. I haved used WSL_Mask223 by weescotslass which can be downloaded here.
Word art of Choice .. I have used word art by Eclectic Chaos which can be downloaded here.
Font of Choice .. Constanza
Let's get started
New image 600x600 and floodfill with white. New raster layer, select all, paste into selection Paper 7. Select none. New mask layer from image, Vix_Mask223, invert transparency unchecked, and merge group.
Copy and paste Splat 1, resize 50% & drop shadow. I have used 2/2/40/4 throughout. Position top right hand corner.
Layer duplicate and move down to bottom right hand corner.
Copy and paste Splat 2, resize 35% & drop shadow. Position next to your first black splat.
Layer duplicate and move down next to your 2nd black splat. Layer duplicate and position top right hand corner.
Copy and paste Frame 11, resize 85% & drop shadow.
Copy and paste Frame 9 & resize 80%. Using your magic wand, select the center portion of your frame, selections modify/expand 5. Copy and paste Paper 10 below your frame layer, selections invert and hit delete. Do not deselect.
Copy and paste below your frame your tube & resize 85%. Layer duplicate and drag this layer above your frame. On the tube layer below you frame, hit delete. Select none. Select the tube layer above your frame and erase the bottom portion of the tube so it appears to be coming out of your frame. Drop shadow your frame.
Copy and paste Dead Tree 1, resize 60% & drop shadow. Position bottom right hand corner. Layer duplicate, resize 65% & mirror.
Copy and paste Rose 1, resize 50% & drop shadow. Position bottom left hand corner.
Copy and paste Doodle 1, resize 75% & dropshadow. Position along the bottom. Copy and paste Ribbon 3, rotate left 45 & drop shadow. Position along the bottom.
Copy and paste Rose 3, resize 40% & drop shadow. Position next to your black rose. Copy and paste Bow 1, resize 50% & drop shadow. Position next to your roses. Copy and paste Rose 2, resize 40% & drop shadow. Position on your bow.
Copy and paste Goblet, resize 65% & drop shadow. Position bottom right hand corner. Copy and paste Candles 3, resize 40% & drop shadow. Position next to your goblet.
Copy and paste Heart 5, resize 50%, rotate right 15 & drop shadow. Position next to your candles.
Copy and paste Charm, resize 40% & drop shadow. Position top left hand corner. Copy and paste Bow 5, resize 30% & drop shadow. Position at the top of your charm.
Copy and paste your Word Art & resize 85%. I then added the following gradient glow and drop shadow.

X out white background, merge visible. Open white background, resize to your liking (I have used 500x500).
Add copyright and name on your tag. I have used Satanick, Size 48, color black and then added the same gradient glow & drop shadow as with the word art.
Save and you are done.
I hope you have enjoyed my tutorial. Pls feel free to experiment and use my tutorial as a guide.
Please feel free to send me your results. I'd love to see what you came up with.
Sunday, January 23, 2011
Let It Snow Tut
3:48 PM | Posted by
Shal |
Edit Post

Feel free to use my tutorial as a guide and have fun giving it your own spin.
This tutorial assumes you have a working knowledge of PSP.
Needed Supplies & Filters :
Tube of Choice .. I am using the work of Ann Gates Fiser (www.moontoegallery.com) which you must have a license to use. Please do not use her work without purchasing through My Tag Art here.
Scrap Kit of Choice .. I have used a gorgeous PTU Scrap kit from Creative Intentionz called "Jingly Bells" which can be purchased here.
Mask of Choice .. I haved used Vix_Mask434 by Vix which can be downloaded here.
Word art of Choice .. I have used word art by Lori which can be downloaded here.
Font of Choice .. Constanza
Let's get started
New image 600x600 and floodfill with white. New raster layer, select all, paste into selection Paper 10. Select none. New mask layer from image, Vix_Mask434, invert transparency unchecked, and merge group. Adjust/add remove noise/random monochrome checked/50%.
New raster layer, select all, paste into selection Paper 12. Select none. New mask layer from image, Vix_Mask434, invert transparency unchecked, and merge group. Resize 85% and rotate left 10. Adjust/add remove noise/random monochrome checked/50%.
Copy and paste Wreath 1. Using your magic wand, select the center portion of your frame, selections modify/expand 5. Copy and paste Paper 9 below your frame layer, resize 65%, selections invert and hit delete. Select none. Merge down your frame and backround & drop shadow your frame. I have used 2/2/40/4 throughout. Centre nicely.
Copy and paste Bellsnbow, resize 65% & drop shadow. Position hanging from the left hand side.
Copy and paste Berry Branch, resize 65% & drop shadow. Position on the right hand side. Layer duplicate, mirror & position next to your first branch. Merge down both branches, layer duplicate, mirror and resize 75%.
Copy and paste Poinsettia, resize 50% & drop shadow. Position bottom right hand corner over your branch stems. Layer duplicate, resize 65% & position next to your first poinsettia.
Copy and paste Bling & resize 65%. Position along the bottom. Layer duplicate & flip.
Copy and paste Tag 1, resize 65%, rotate right 10 & drop shadow. Position along the bottom.
Copy and paste your tube and drop shadow. Reposition your tube and tag as necessary so it appears tag is peeking out from under the sled.
Copy and paste Streamer 1 below your tube layer, resize 50%, rotate left 80 & drop shadow. Position along the top of your tag.
Repeat with Streamer 2.
New raster layer above your tube layer, select all. Copy and paste into selection Snowsheet. Select none.
X out white background, merge visible. Open white background, resize to your liking (I have used 500x500).
Copy and paste your word and drop shadow.
Add copyright and name on your tag. I have used Constanza, Size 48, color #dc4d9e and then drop shadow.
Save and you are done.
I hope you have enjoyed my tutorial. Pls feel free to experiment and use my tutorial as a guide.
Please feel free to send me your results. I'd love to see what you came up with.
Monday, January 17, 2011
Winter Blues Sale !!!
1:23 PM | Posted by
Shal |
Edit Post

Winter Blues .99 Sale
Jan 17 - 31
Wednesday, January 12, 2011
1$ Wednesday at Twilight Scraps
10:06 AM | Posted by
Shal |
Edit Post
1$ Wednesday at Twilight Scraps
Don't forget today is 1$ Wednesday at Twilight Scraps ! Some of their designers have selected some of their kits especially for 1$ Wednesday ! You can find all of my items here and while you're there take a minute to check out all the awesome designs available today for only 1$. All 1$ Wednesday deals can be seen here.

Valentine/Love Themed Kits
9:47 AM | Posted by
Shal |
Edit Post
Shal's World Valentine/Love Themed Kits
As we near Valentine's Day, I thought I would remind you of all the love themed kits I currently have available.

Love Mini Kit *FTU*
Available exclusively for download at My Tag Art here.

On the Wings of Love *PTU*
Currently available at My Tag Art, Scrappin Warehouse, The Creativity Box, Twilight Scraps, Wilma4ever & Your Scrap Addiction.

Darker Side of Love *PTU*
Currently available at My Tag Art, Scrappin Warehouse, The Creativity Box, Twilight Scraps, Wilma4ever & Your Scrap Addiction.
Currently available at My Tag Art, Scrappin Warehouse, The Creativity Box, Twilight Scraps, Wilma4ever & Your Scrap Addiction.

Love is in the Air *PTU*
Currently available at My Tag Art, Scrappin Warehouse, The Creativity Box, Twilight Scraps, Wilma4ever & Your Scrap Addiction.
Monday, January 10, 2011
Kisses & Cuddles Tut
10:46 AM | Posted by
Shal |
Edit Post

Feel free to use my tutorial as a guide and have fun giving it your own spin.
This tutorial assumes you have a working knowledge of PSP.
Needed Supplies & Filters :
Tube of Choice .. I am using the work of Jennifer Janesko which you must have a license to use. Please do not use her work without purchasing through CDO here. I am licensed through CILM which is now closed.
Scrap Kit of Choice .. I have used a gorgeous PTU scrap kit from Designs by Stina called Kisses and Cuddles which can be purchased here.
Mask of Choice .. I haved used zuzzanna_mask7 by Zuzzanna which can be downloaded here.
Template of Choice .. I have used Valentine Template 5 by Addictive Pleasures which can be downloaded here.
Font of Choice .. Carattere Rob
Let's get started
Open your template in PSP & delete credits, text & hearts 3 layer.
New raster layer just above your background layer. Select all, copy and paste into selection Paper 12. Select none. New mask layer from image, zuzzanna_mask7, invert transparency checked. Merge group.
Select Rectangle layer, select all/float/defloat, copy and paste Paper 16, resize 75%, selections invert and hit delete. Select none and delete original Rectangle layer.
Add the following gradient glow & then drop shadow. I have used 2/2/40/4 throughout.

Copy and paste Heart Swirl 3, resize 40% & drop shadow. Position centre.
Select Circle layer, select all/float/defloat, copy and paste Paper 17, selections invert and hit delete. Select none and delete original Circle layer. Add the following gradient glow & then drop shadow.

Repeat with Strip Layer.
Copy and paste your tube. Position above your circle layer. Drop shadow. Layer duplicate and mirror.
On the first tube layer, trim the bottom off, if necessary, that is sticking out of the bottom the heart layer. Change blend mode to luminance legacy.
For the 2nd tube layer, I moved the Heart2 layer down a bit to cover the AC content of the tube. Then I again trimmed the ends of the tube that were sticking out under the heart.
Select Glitter hearts layer. Adjust color balance/manual color correction from white to #da4d7c.
Select Hearts layer. Adjust color balance/manual color correction from #fec6e2 to #fb9cb2.
Select Heart layer, select all/float/defloat, copy and paste Paper 20, selections invert and hit delete. Select none and delete original Heart layer. Add drop shadow.
Select Heart 2 layer. Adjust color balance/manual color correction from #e5589c to #fb9cb2.
Select Hearts 2 layer. Adjust color balance/manual color correction from white to #fb9cb2. Adjust/add remove noise/uniform monochrome checked/50%. Add drop shadow.
Copy and paste Rose 1, resize 65%, rotate right 90, flip & drop shadow. Position along the bottom. Repeat with Rose 2 this time resizing 50%.
Copy and paste Champagne Gift Box, resize 35%, mirror & drop shadow. Position bottom right hand corner.
Copy and paste Beaded Wire 1, resize 60% & drop shadow. Position hanging down over the heart column. Copy and paste Heart Flower 2, resize 40% twice & drop shadow. Position at the top of the Beaded Wire so it looks to be hanging from the flower.
Copy and paste Beaded Wire 6, resize 60% & drop shadow. Position along the bottom.
X out white background, merge visible. Open white background, resize to your liking (I have used a width of 600).
Add copyright. I have used Carattere Rob, Size 60, color black and then added the 2nd gradient glow used earlier (white & black) and then drop shadow.
Save and you are done.
I hope you have enjoyed my tutorial. Pls feel free to experiment and use my tutorial as a guide.
Please feel free to send me your results. I'd love to see what you came up with.
Saturday, January 1, 2011
January Featured Designer at The Creativity Box !!!
4:39 PM | Posted by
Shal |
Edit Post

What a surprise ! I was chosen to be featured designer at the Creativity Box for the month of January !!! Thanks so much Mandy for selecting me !
I'll be featuring a .99 cents sale for the whole month ! Stop by my store here !
Sales Sales & More Sales at Wilma4ever ! Weekend Deals extended !
4:00 PM | Posted by
Shal |
Edit Post
So much happening at Wilma4ever !!!
Weekend Deals are extended until January 5th ! Stop by here to check out all the spectacular items available for just 1.00$ until January 5th !
Sales sales sales are everywhere at Wilma4ever ! Designers at Wilma4ever are hosting a variety of New Year's sales until January 7th. Stop by my shop here to take advantage of a 50% off sale ! Included is the rerelease of my Love Is In The Air kit , as well as Darker Side of Love & On The Wings of Love kits .. just in time for the season of love ! And don't forget my latest winter themed kit .. Winter Wonders !
So what are you waiting for ... come visit Wilma4ever !
Subscribe to:
Posts (Atom)
Kits & Tuts


Blogs I Love


