About Me
My hobbies are PSP.
I love helping my friends who are starting with PSP.
Any similarity or resemblance to any other tutorial is purely coincidental and unintentional. Pls do not recopy my tutorials anywhere. Many thanks Susan.


Credit

Blinkie created by Rabid Designz. She does some amazing work ! Thanks so much Melissa.

Blinkie created by my long time friend tweety here. Thanks so much my friend :)
My blog was designed By Alika's Scraps. Thanks so much. You did an amazing job !

Monday, June 28, 2010
 Breath of Spring Tut
11:26 AM | Posted by
Shal |
 Edit Post

Feel free to use my tutorial as a guide and have fun giving it your own spin.
This tutorial assumes you have a working knowledge of PSP.
Needed Supplies & Filters :
Tube of Choice .. I am using the work of Teri Rosario (www.terirosario.com) which you must have a license to use. Please do not use her work without purchasing through My Tag Art here.
Scrap Kit of Choice .. I have used a gorgeous scrapkit from Heartfelt Perfections called Country Essence which you can purchase here.
Mask of Choice .. I haved used zuzzanna_mask24 which can be downloaded here.
Word Art of Choice .. I have used word art by Feli which can be downloaded here.
Font of Choice .. Gwendolyn Bold
Let's get started
New image 600x600 and floodfill with white. New raster layer, select all, paste into selection Paper 5, select none. New mask layer from image, zuzzanna_mask24, invert transparency checked, and merge group.
Copy and paste Window 2 & resize 45%. Using your magic wand, select the middle window area, selections/modify/expand 5. Copy and paste below your window Paper 2, resize 45% twice, selections invert and hit delete. Drop shadow your frame. I have used 2/2/40/4 throughout.
Copy and paste Leaves 3, resize 45% & drop shadow. Position bottom left hand side in the middle window. Layer duplicate and mirror. Copy and paste Yellow flowers, resize 45% twice & drop shadow. Position top left hand side in your middle window. Layer duplicate & mirror. See my tag for placement.
Copy and paste Ribbon 4, resize 45% & drop shadow. Position hanging down the left hand side. Copy and paste Ribbon, resize 45%, mirror & drop shadow. Position hanging down the right hand side.
Copy and paste Deco frame 2, resize 35% & drop shadow. Position on the right hand side. Copy and paste Swag 2, resize 40% & drop shadow. Position on the left hand side.
Copy and paste your tube. Drop shadow.
Copy and paste Sunflower, resize 35% twice & drop shadow. Position bottom left hand corner. Copy and paste Yellow flower, resize 35% twice & drop shadow. Position next to your sunflower.
Copy and paste Ribbon 2, resize 45% twice & drop shadow. Position on the bottom left hand side. Layer duplicate, mirror/flip & position on the bottom right hand side.
Copy and paste Floral, resize 50% twice & drop shadow. Position bottom right hand corner.
X out white background, merge visible. Open white background, resize to your liking (I have used 500x500).
Copy and paste your word art, resize 50% & drop shadow. Position top right hand corner.
Add copyright and your name. I have used Gwendolyn Bold, Size 48, color #ff840e and then added a size 3 fat white gradient glow and then drop shadow.
Save and you are done.
I hope you have enjoyed my tutorial. Pls feel free to experiment and use my tutorial as a guide.
Please feel free to send me your results. I'd love to see what you came up with.
Sunday, June 27, 2010
Chocolate Dreams Tut
1:25 PM | Posted by
Shal |
Edit Post

Feel free to use my tutorial as a guide and have fun giving it your own spin.
This tutorial assumes you have a working knowledge of PSP.
Needed Supplies & Filters :
Tube of Choice .. I am using the work of Chrissy Clark (www.chrissyclark.com) which you must have a license to use. Please do not use her work without purchasing through My Tag Art here.
Scrap Kit of Choice .. I have used a gorgeous scrapkit from Creative Intentionz called Chocolate Dreams which you can purchase here.
Mask of Choice .. I haved used zuzzanna_mask42 which can be downloaded here.
Font of Choice .. Mama Script
Let's get started
New image 600x600 and floodfill with white. New raster layer, select all, paste into selection Paper 9, select none. New mask layer from image, zuzzanna_mask42, invert transparency checked, and merge group.
Copy and paste Charm beads 3 & drop shadow. I have used 2/2/40/4 throughout. Position bottom left hand corner.
Copy and paste your tube and resize as needed. Position on the middle square section of your mask and trim sides of your tube, if neccessary, so it fits nicely. Add drop shadow.
Copy and paste Scattered hearts 3, resize 85% & adjust/add remove noise/uniform & mono checked/50% & drop shadow. Position coming down on the right hand side.
Copy and paste Scattered hearts 2, resize 75%, mirror, add same noise and drop shadow as before. Position nicely with your other string of hearts.
Copy and paste Curled ribbon 3, resize 75% & drop shadow. Position on the left hand side. Layer duplicate, rotate right & position along the bottom centre.
Copy and paste Satin heart 3, resize 75% & drop shadow. Position bottom left hand corner.
Copy and paste Flower 3, resize 50% & drop shadow. Position bottom left corner. Copy and paste Organza flower 3, resize 50% & drop shadow. Position next to your other flower.
Copy and paste Bow 3, resize 65%, rotate left 15 & drop shadow. Position top left hand corner.
X out white background, merge visible. Open white background, resize to your liking (I have used 500x500).
Add copyright and your name. I have used Mama Script, Size 48, color #623721 and then added the same noise as used before, followed by a size 3 fat white gradient glow and then drop shadow.
Save and you are done.
I hope you have enjoyed my tutorial. Pls feel free to experiment and use my tutorial as a guide.
Please feel free to send me your results. I'd love to see what you came up with.
Tuesday, June 22, 2010
Fun In The Sun Tut
12:32 PM | Posted by
Shal |
Edit Post

Feel free to use my tutorial as a guide and have fun giving it your own spin.
This tutorial assumes you have a working knowledge of PSP.
Needed Supplies & Filters :
Tube of Choice .. I am using the work of Hannah Lynn (www.hannahlynnart.com) which you must have a license to use. Please do not use her work without purchasing through My Tag Art here.
Scrap Kit of Choice .. I have used my latest PTU scrap kit called Fun In The Sun which you can purchase at My Tag Art here.
Mask of Choice .. I haved used WSL_Mask83 which can be downloaded here.
Font of Choice .. Mama Script
Let's get started
New image 600x600 and floodfill with white. New raster layer, select all, paste into selection Paper 26. New mask layer from image, WSL_Mask83, invert mask data unchecked, and merge group.
Copy and paste Frame 6, resize 85% & drop shadow. I have used 2/2/40/4 throughout.
Copy and paste Frame 5, rotate right 90 and resize 75%. Using your magic wand, select the center portion of your frame without forgetting any lil bits, selections modify/expand 6. Copy and paste Paper 21 below your frame layer, resize 75%, selections invert and hit delete. Do not deselect. Copy and paste your tube or image & hit delete. Select none. Drop shadow your frame.
Copy and paste Element 11, resize 40% & drop shadow. Position bottom right corner. Copy and paste Chair 5, mirror, resize 65% & drop shadow. Position bottom right corner on your sand. Copy and paste Element 8, resize 50% & drop shadow. Position next to your chair.
Copy and paste Element 14, resize 50% & drop shadow. Position left hand side. Copy and paste Element 12, resize 65%, rotate right 25 & drop shadow. Position bottom left hand corner.
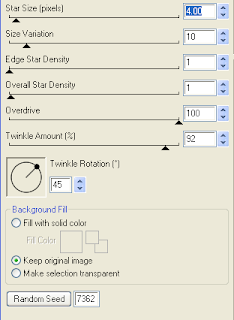
Copy and paste Flower 5 & resize 50%. Select all/float/defloat & apply the following constellation setting for a little sparkle and then add drop shadow.

Copy and paste Bow 10, resize 35% & drop shadow. Position top right hand corner of your frame. Copy and paste Ribbon 10 below your bow layer, resize 65% & drop shadow. Position hanging below your bow.'
Copy and paste Word Art 5, resize 50%, rotate left 10 and then add the following gradient glow followed by drop shadow.

X out white background, merge visible. Open white background, resize to your liking (I have used 500x500).
Add copyright and your name. I have used Mama Script, Size 48, color #299c9f and then added the same gradient glow and drop shadow as before.
Save and you are done.
I hope you have enjoyed my tutorial. Pls feel free to experiment and use my tutorial as a guide.
Please feel free to send me your results. I'd love to see what you came up with.
Sunday, June 20, 2010
Kat's Gemini Tut
10:00 PM | Posted by
Shal |
Edit Post

Feel free to use my tutorial as a guide and have fun giving it your own spin.
This tutorial assumes you have a working knowledge of PSP.
Needed Supplies & Filters :
Tube of Choice .. I am using the work of KatNKDA which you must have a license to use. Please do not use her work without purchasing through her store here.
Scrap Kit of Choice .. I have used a gorgeous PTU scrap kit from KatNKDA's new Zodiac Series called "Gemini" which you can purchase through her store here.
Mask of Choice .. I haved used zuzzanna_mask05 which can be downloaded here.
Font of Choice .. Mama Script
Let's get started
New image 700x600 and floodfill with white. New raster layer, select all, copy and paste into selection Paper 20. Select none. New mask layer from image, zuzzanna_mask05, invert transparency unchecked. Merge group. Resize 95%. I then added the following constellation setting.
New raster layer, select all, copy and paste into selection Paper 8. Select none. New mask layer from image, zuzzanna_mask05, invert transparency unchecked. Merge group.
Resize 65%, rotate right 45 and move to the left hand side. Layer duplicate & mirror. Merge down both yellow layers and lower opacity to 80%
Copy and paste Element 2 & resize 40% twice. Using your magic wand, select the center portion of your frame, selections modify/expand 6. Copy and paste into selection Paper 19 and drag this layer beneath your frame layer. Do not deselect.
Copy and paste below your frame your tube (I used the tagger size version). Layer duplicate and drag this layer above your frame. On the tube layer below you frame, selections invert, hit delete. Select none. Select the tube layer above your frame and erase the bottom portion of the tube so it appears to be coming out of your frame. Drop shadow your frame. I have used 2/2/40/4 throughout.
Copy and paste Element 54, resize 30% twice, rotate left 10 & drop shadow. Position on the bottom of your frame a little to the left.
Copy and paste Element 52, resize 60% twice & drop shadow. Position bottom centre on your ribbon. Copy and paste Element 51, resize 60% twice, mirror & drop shadow. Position a lil over from your other string of flowers.
Copy and paste Element 47, resize 40% twice, mirror & drop shadow. Position bottom left hand corner. Copy and paste Element 26, resize 40% twice, rotate left 90 & drop shadow. Position bottom left hand side.
Copy and paste Element 23, resize 50% twice, mirror & drop shadow. Position bottom right hand corner.
Copy and paste Element 22, resize 25% twice, mirror & drop shadow. Position a little to the left of bottom centre. Copy and paste Element 21, resize 25% twice & drop shadow. Position to the left of your other rose.
Select your yellow mask layer. Copy and paste Element 18, resize 40% twice & drop shadow.
Copy and paste Element 16, resize 40% twice & drop shadow. Position on the right hand side. Layer duplicate, mirror and flip.
Select your top layer. Copy and paste Element 1, resize 40% twice, rotate right 15 & drop shadwo. Position top right hand corner.
Copy and paste Element 44 below your bow layer, resize 25% twice, rotate left 10 & drop shadow. Position so it appears to be hanging from your bow.
Copy and paste Word art 1, resize 45% twice & drop shadow. Position bottom right hand corner. Copy and paste Word art 2, resize 35% twice & drop shadow. Position just below your first Word Art.
If you prefer not to use the Gemini Word Art, select one of the other pieces of word art or skip it all together.
X out white background, merge visible. Open white background, resize to your liking (I have used a width of 600). Add copyright.
In your materials palette, select black for your background color and a gold pattern for your foreground and add your name in the tag. I have used Mama Script size 30 and rotated my text a bit.
Save and you are done.
I hope you have enjoyed my tutorial. Pls feel free to experiment and use my tutorial as a guide.
Please feel free to send me your results. I'd love to see what you came up with.

Friday, June 18, 2010
Always In My Heart Tut
11:50 PM | Posted by
Shal |
Edit Post

Feel free to use my tutorial as a guide and have fun giving it your own spin.
This tutorial assumes you have a working knowledge of PSP.
Needed Supplies & Filters :
Photography of Choice .. I am using the work of Guki Creations which you must have a license to use. Please do not use her work without purchasing through Mistaken Art here.
Scrap Kit of Choice .. I have used a gorgeous PTU Kit from Bello Scarto called Cold Cold Heart which can be purchased here.
Template of Choice .. I have used template 251 by Missy which can be downloaded from her blog here.
Mask of Choice .. I haved used zuzzanna_mask5 which can be downloaded here.
Word Art of Choice .. I have used word art by Feli which can be downloaded here.
Font of Choice .. Mama Script
Let's get started
Open your template in PSP. Delete credits and word art. Adjust canvas size to 678x519. Select bottom layer and floodfill with white.
New raster layer/ Select all, copy and paste into selection Paper 9. New mask layer from image, zuzzanna_mask5, invert transparency unchecked. Merge group. Resize 85%.
Select Oval layer, select all/float/defloat, copy and paste Paper 1, resize 75%. selections invert and hit delete. Do not deselect. Copy and paste Element 21, resize 75%, position nicely in your oval, hit delete. Select none and delete original Oval layer. Drop shadow your element. I have used 2/2/40/4.
Merge down both layers and resize 85%. I then added the following gradient glow and drop shadow.

Copy and paste Element 40, resize 75% & drop shadow. Position bottom left hand side.
Copy and paste Element 28, resize 60% & drop shadow. Position top left hand corner. Copy and paste Element 29, resize 50%, flip, mirror & drop shadow. Position bottom right hand corner.
Copy and paste Element 32, resize 45%, rotate left 10 & drop shadow. Position bottom left hand corner. Copy and paste Element 5, resize 30% & drop shadow. Position on your tag.
In your layer palettes, drag Frame background 2 layer below your Frame 1 layer. Merge down Frame background 2 layer & Frame background layer 1.
Select the newly merged layer, select all float/defloat, copy and paste your first image, selections invert and hit delete. Select none and delete the original merged layer.
Select Frame 1, select all/float/defloat, new raster layer, floodfill with #0d1218. Selections none and delete original Frame 1 layer. Adjust add remove noise/uniform & mono checked/50 & drop shadow. Repeat for Frame layers 2 & 3.
Select Frame background 3 layer, select all float/defloat, copy and paste your second image, selections invert and hit delete. Select none and delete the original Frame background 3 layer.
Copy and paste Element 17, resize 65% & drop shadow. Position bottom right hand side. Copy and paste Element 23, resize 40% & drop shadow. Position also in the bottom right hand side in the corner.
Copy and paste Element 15, resize 35% & drop shadow. Position on the left hand side.
Copy and paste Word art, resize 75% and I then added a size 4 fat color #aac1da gradient glow, followed by a size 4 fat gradient glow and then drop shadow. Position top centre.
X out white background, merge visible. Open white background, resize to your liking (I used a width of 575.
Add copyright and your name. I have used Mama Script size 36, color #1e2831, then added a size 4 fat color #aac1da gradient glow.
Save and you are done.
I hope you have enjoyed my tutorial. Pls feel free to experiment and use my tutorial as a guide.
Please feel free to send me your results. I'd love to see what you came up with.
Happy Birthday Sale !!! 50% off !
2:25 AM | Posted by
Shal |
Edit Post

It's my birthday on June 23 ! I thought it's the perfect time to offer a lil sale. From now until the end of the month, all my items at My Tag Art, Just4Taggers, Wilma4ever & Your Scrap Addiction are currently on sale 50% off ! That means that everything is 1.00$. Take the time to stop in and visit !
CU License for Gemini Creationz Tubes/Images
2:15 AM | Posted by
Shal |
Edit Post

Imagine my surprise ! I won a CU License from Gemini Creationz for all her tubes and images ! Hopefully you'll be able to see some of these great products in my future kits ! Thanks so much Vicki for hosting this great contest !

A Pirate's Life Tagger Size Kit
2:09 AM | Posted by
Shal |
Edit Post

A Pirate's Life Tagger Size Kit
This kit contains 30 papers (700x700 in size), 65 elements & 1 alpha. Elements include bubbles, flairs, frames, ribbons, word art and an awesome variety of pirate themed elements that include barrels, treasure chest, gold coins, eye patch, flag, canon, palm trees, seagull, ship, skeleton, sword and the most adorable duelling pirates !
Perfect kit to let the pirate out in you !
Perfect kit to let the pirate out in you !
Currently available at My Tag Art, Scrappin Warehouse, The Creativity Box, Wilma4ever & Your Scrap Addiction.
Fun In The Sun Tagger Size Kit
2:06 AM | Posted by
Shal |
Edit Post

Fun In The Sun Tagger Size Kit
This kit contains 31 papers (700x700 in size) & 91 elements. Elements include bows, beach chairs, flairs, flip flops, flowers, frames, ice cream cones, pails, ribbons, shovels, suns, towels & word arts and a gorgeous variety of beach themed elements that include tropical fruit & drink, floatie, shells, starfish, sea horse, sand, greenery & palm trees.
Perfect kit to frollick in the sun !
Currently available at My Tag Art, Scrappin Warehouse, The Creativity Box, Wilma4ever & Your Scrap Addiction.
Out to Sea Tagger Size Kit
2:03 AM | Posted by
Shal |
Edit Post

Out To Sea Tagger Size Kit
This kit contains 30 papers (700x700 in size), 74 elements & 1 alpha. Elements include bows, buttons, doodles, flairs, flowers, frames, ribbons and a gorgeous variety of sea themed elements that include beach cabin, lighthouse, ship, sea birds, beach chair, sea plants & shells, palm trees & greenery and the most adorable lil boy and girl !
Perfect kit to enjoy the sea !
Perfect kit to enjoy the sea !
Currently available at My Tag Art, Scrappin Warehouse, The Creativity Box, Wilma4ever & Your Scrap Addiction.

Friday, June 11, 2010
Swag Bucks earns you amazing prizes !
4:34 PM | Posted by
Shal |
Edit Post

Have you tried Swag Bucks yet ? If you haven't .. what are you waiting for. We all know about these online money making schemes that aren't worth wasting your breath and time, but Swag Bucks really works. In a matter of weeks, I've already earned multiple Amazon gift certificates. It's that easy ! You can earn Swag Bucks by using a search engine for searches you would normally make. You can get Swag Bucks to be used towards Gift Cards, Paypal Cards, & other items ! There is quite a few daily opportunities to earn Swag Bucks for a simple click ! I'm amazed at how easy it is and how quickly I'm racking up some rewards !
If you would like to try it just click here !
If you have any questions about Swag Bucks, pls holler out ! I'll be happy to tell you what I know and do !
Tut using my A Floral Surprise Scrap Kit
4:27 PM | Posted by
Shal |
Edit Post

My dear friend tweety wrote this tutorial using my "A Floral Surprise" scrap kit. You did a great job and you were right .. tube matches perfectly. I love the you covered the lil bits cause I'm so squeamish hehe. Thanks so much my friend I just love it !
Tutorial can be found here.
Sunday, June 6, 2010
Misbehavin Tut
8:58 PM | Posted by
Shal |
Edit Post

Feel free to use my tutorial as a guide and have fun giving it your own spin.
This tutorial assumes you have a working knowledge of PSP.
Needed Supplies & Filters :
Tube of Choice .. I am using the work of Keith Garvey which you must have a license to use. Please do not use his work without purchasing through My PSP Tubes here.
Scrap Kit of Choice .. I have used a gorgeous PTU Kit from Gina's Gems called Wicked Intentionz which can be purchased here.
Template of Choice .. I have used template 354 by Missy which can be downloaded from her blog here.
Mask of Choice .. I haved used zuzzanna_mask5 which can be downloaded here.
Font of Choice .. Grape Nuts Rob
Let's get started
Open your template in PSP. Delete credits & both small circle right and left layers. Select bottom layer. Resize canvas size 625x625 & floodfill background layer with white.
New raster layer/ Select all, copy and paste into selection Paper 10. Select none. New mask layer from image, zuzzanna_mask5, invert transparency unchecked. Merge group. Layer duplicate and merge down both mask layers.
Select Square 1 layer, select all/float/defloat, copy and paste Paper 12, resize 65%, selections invert and hit delete. Do not deselect.
New raster layer, selections modify/expand by 6 and floodfill with #b2221e. Adjust/add remove noise/uniform and mono checked/35%. Select none. Move below your square paper layer & add drop shadow. I have used 2/2/40/4 throughout. Delete original Square 1 layer.
Repeat for Square 2 layer using Paper 13, then floodfilling with color white and add noise twice.
Select Thin rectangle 1 layer, select all/float/defloat, new raster layer, floodfill with #b2221e. Adjust/add remove noise/uniform and mono checked/35%. Select none. Add drop shadow and delete Thin rectangle 1 layer.
Repeat for Thin rectangle 2 layer using color black.
Select Large circle layer, select all/float/defloat, copy and paste Paper 8, resize 65%, selections invert and hit delete. Select none. Delete original Large Circle layer. I then added a gradient glow size 6 black as well as drop shadow.
Select Glittered rectangle layer, select all/float/defloat, new raster layer, floodwill with black. Adjust/add remove noise/uniform and mono checked/35%. Select none. I then added the following gradient glow and drop shadow. Delete original Glittered rectangle layer.

Select Rectangle layer, select all/float/defloat, copy and paste Paper 26, resize 65%, selections invert and hit delete. Select none. Delete original Rectangle layer.
Select Small circle layer, select all/float/defloat, copy and paste Paper 24, resize 65%, selections invert and hit delete. Select none. Delete original Small Circle layer. Add drop shadow. Repeat drop shadow using -2/-2/40/4.
Select Frame background layer, select all/float/defloat, copy and paste Paper 16, resize 65%, selections invert and hit delete. Copy and paste Tube closeup and hit delete. Select none. Delete original Frame background layer. Change blend mode of your tube layer to luminance legacy.
Select Frame layer, select all/float/defloat, copy and paste Paper 27, resize 65%, selections invert and hit delete. Select none. Add the same black/white gradient glow as used before and add drop shadow. Delete original Frame layer.
Copy and paste Double tag 1, resize 75%, rotate left 15 & drop shadow. Position bottom right hand corner of your frame.
Copy and paste Heart string 4 & drop shadow. Position top left hand corner. Copy and paste Bottle cap 4 & drop shadow. Position on the top of your heart string.
Copy and paste your full length tube, resize if necessary & drop shadow. Position on the left hand side of your frame.
Copy and paste Folder ribbon 4, resize 75%, flip & drop shadow. Position on the bottom. Copy and paste Bow charm 2, resize 65% & drop shadow. Position bottom right hand corner on the end of your folded ribbon.
Copy and paste, above your mask layer, Doodle 2, resize 65% & drop shadow. Position top right hand corner. Copy and paste Doodle 1, resize 65% & drop shadow. Position bottom left hand corner.
Copy and paste your selected Word art. I have chosen to change the color of the word art a bit. Changing "I am planning on" from #45eeff to #b2221e as well as "wanna join me?" from #ff3dbc to #b2221e. I used my magic wand to select each letter and then adjust/color balance/manual color correction from one to the other. I also added the noise we had used previously. You may decide to this in a way you find easier. This one works best for me.
I also then used my magic wand to select "Misbehavin" and added noise to it also.
X out white background, merge visible. Open white background, resize to your liking (I used 500x500).
Add copyright and your name. I have used Grape Nuts ROB Size 30 white.
Save and you are done.
I hope you have enjoyed my tutorial. Pls feel free to experiment and use my tutorial as a guide.
Please feel free to send me your results. I'd love to see what you came up with.
Saturday, June 5, 2010
New Award !
10:18 PM | Posted by
Shal |
Edit Post

I'm so excited ! One of my tutorials won an award on the Gorjuss blog ! Imagine my surprise ! Big thanks to Suzanne Woolcott for sponsoring the contest on their Gorjuss blog and to anyone who took the time to vote for my tutorial ! And a huge thanks to Puddicat for such a gorgeous scrap kit that inspired this tutorial !
You can find my tutorial here.

Little Things Tut
10:06 PM | Posted by
Shal |
Edit Post

Feel free to use my tutorial as a guide and have fun giving it your own spin.
This tutorial assumes you have a working knowledge of PSP.
Needed Supplies & Filters :
Tube of Choice .. I am using the work of Lisa Victoria which you must have a license to use. Please do not use her work without purchasing through Up Your Art here. I am licensed through Artistic Minds Inc. but they are now closed.
Scrap Kit of Choice .. I have used a PTU scrap kit called First Blossoms by KatNKDA which can purchased here.
Mask of Choice .. I haved used zuzzanna_mask05 which can be downloaded here.
Word Art of Choice .. I have used word art from Lori which can be downloaded here.
Font of Choice .. Mama Script
Let's get started
New image 600x600 and floodfill with white. New raster layer, select all, paste into selection Paper 13. Select none. New mask layer from image, zuzzanna_mask05, invert transparency unchecked. Merge group.
Copy and paste Element 05, resize 85% & rotate left 90.
Using your magic wand, select the center portion of your frame, selections modify/expand 6. Copy and paste Paper 11 below your frame layer, resize 75%, selections invert and hit delete. Do not deselect. Copy and paste your image, resize to your liking and hit delete. Select none.
Change blend mode of your image to luminance legacy. Drop shadow your frame. I have used 2/2/40/4 throughout.
Copy and paste Element 20, resize 65% & drop shadow.
Copy and paste Element 23, resize 35% & drop shadow. Position top right hand corner. Copy and paste Element 24, resize 25% & drop shadow. Position on your last element.
Copy and paste Element 19, resize 75% & drop shadow. Position hanging on top of your last 2 elements.
Copy and paste Element 02, resize 50%, mirror & drop shadow. Position bottom left hand side. Copy and paste Element 01, resize 75%, image flip & drop shadow. Position bottom left hand corner.
Copy and paste Element 15, resize 50% & drop shadow. Position top centre.
Copy and paste your Tube, resize 75% & drop shadow. Position to the left of centre.
X out white background, merge visible. Open white background, resize to your liking (I have used 500x500). Add copyright.
Copy and paste word art. Adjust color balance/manual color correction from black to #a44b74. I then added the following gradient glow & drop shadow. Position top right hand corner.

In your materials palette, select Paper 11/Angle 0/Scale 50 for your background color and add your name I have used Mama Script size 72. I then added Gradient glow/fat/size 25/color #e4d5a9 and then drop shadow.
Save and you are done.
I hope you have enjoyed my tutorial. Pls feel free to experiment and use my tutorial as a guide.
Please feel free to send me your results. I'd love to see what you came up with.
Friday, June 4, 2010
Spring Has Sprung Tut
10:45 AM | Posted by
Shal |
Edit Post

Feel free to use my tutorial as a guide and have fun giving it your own spin.
This tutorial assumes you have a working knowledge of PSP.
Needed Supplies & Filters :
Tube of Choice .. I am using the work of Terry Heuser (www.mytagart.com) which you must have a license to use. Please do not use her work without purchasing through My Tag Art here.
Photography of Choice .. I am using the work of Jenny Parson (www.jennyzdreamz.com) which you must have a license to use. Please do not use her work without purchasing through My Tag Art here.
Scrap Kit of Choice .. I have used a gorgeous PTU Kit from Gemini Creationz called Spring Has Sprung which can be purchased at My Tag Art here.
Template of Choice .. I have used template 39 by Cheri at Wild Creationz which can be downloaded from her blog here.
Mask of Choice .. I haved used zuzzanna_mask05 which can be downloaded here.
Font of Choice .. Waterbrush ROB
Filters of Choice .. Xenofex/Constellation & Eye Candy/Gradient glow
Let's get started
Open your template in PSP. Delete credits. Select Raster layer 1.
New raster layer/Select all, copy and paste into selection Paper 1. Select none. New mask layer from image, zuzzanna_mask05, invert transparency unchecked. Merge group.
Select Raster layer 2, select all/float/defloat, copy and paste image, resize 115%, selections invert and hit delete. Delete original Raster layer 2.
Duplicate twice and rename your layers Flowers 1,2 and 3. On your first Flowers layer apply the following Xenofex/Constellation.

Apply the same effects to your next Flowers layer and hit random once. Apply again to your last Flowers layer hitting random twice. Select none. If you decide not to animate your tag, then just skip the duplicate twice.
Select Raster layer 3, select all/float/defloat, new raster layer, floodfill with #ab77cc. Select none. Adjust add/remove noise/gaussian/mono checked/20%. I then added the following gradient glow and drop shadow. I have used 2/2/40/4 throughout. Delete original Raster layer 3. Repeat these steps for Raster layer 6 & Copy of Raster 6.
Select Raster layer 3, select all/float/defloat, new raster layer, floodfill with #ab77cc. Select none. Adjust add/remove noise/gaussian/mono checked/20%. I then added the following gradient glow and drop shadow. I have used 2/2/40/4 throughout. Delete original Raster layer 3. Repeat these steps for Raster layer 6 & Copy of Raster 6.

Select Raster layer 4, select all/float/defloat, new raster layer, floodfill with #5b316d. Select none. Add drop shadow. Repeat drop shadow but using -2/-2/40/4 this time. Delete original Raster layer 4. Repeat these steps for Raster layer 7 & Copy of Raster 7.
Move Raster layer 5 to the top. Merge down Raster layer 5, Raster layer 8 and Copy of raster layer 8.
Select all/float/defloat, copy and paste your image, selections invert and hit delete. Select none. Delete original merged layer. Add drop shadow.
Copy and paste Branch just above your mask layer. Adjust color balance/manual color correction from #7bb838 to #5b316d. Resize 60%, image flip & drop shadow. Position top left hand corner. Layer duplicate and mirror.
Select your top layer. Copy and paste your Tube and drop shadow.
Copy and paste Grass, resize 65% & drop shadow. Position bottom centre over the bottom of your tube.
Copy and paste Frame 4, resize 75% & drop shadow. Position bottom right hand side. Layer duplicate, mirror & flip. Position next to your other ribbon frame.
Layer duplicate, rotate left 90 and position along the side. Drag this layer beneath your tube layer. Layer duplicate and mirror.
Copy and paste String, resize 65%. Adjust color/manual color correction from #42bd48 to #5b316d. Drop shadow and position bottom centre.
Copy and paste Nest, resize 75% & drop shadow. Position bottom left hand side.
Copy and paste Word art 4, resize 65% & drop shadow. Position top right hand corner.
At this point if you need to, resize your tag. I have used 500x500. Add your copyright and name. I have used Water brush ROB, size 48 #5b316d and added the same noise/gradient glow/drop shadow as before.
If you are choosing not to animate, then you can save your tag.
To animate, close off Flowers layer 2 & 3 (the lil eye icon in your layer palette), Edit/Copy Merged and paste as new animation in Animation Shop. Close off Flowers layer 1 and open Flowers layer 2, Edit/Copy Merged and paste after current frame in AS. Close off Flowers layer 2 and open Flowers layer 3, Edit/Copy Merged and paste after current frame in AS.
Save as gif.
I hope you have enjoyed my tutorial.
Pls feel free to experiment and use my tutorial as a guide.
Please feel free to send me your results.
I hope you have enjoyed my tutorial.
Pls feel free to experiment and use my tutorial as a guide.
Please feel free to send me your results.
Wednesday, June 2, 2010
A Pirates Life Collaboration
1:20 PM | Posted by
Shal |
Edit Post

This A Pirates Life Collaboration was put together by 10 very talented designers. You will get this FREE with any purchase of $10.00 OR you can purchase it outright for only $10.00.
Only $1.00 per kit WOW!!
1. Add $10.00 worth of products to your shopping cart.
2. Go to check out and it will automatically add the collab to your cart.
Thank you for supporting Just 4 Taggers !!
1. Add $10.00 worth of products to your shopping cart.
2. Go to check out and it will automatically add the collab to your cart.
Thank you for supporting Just 4 Taggers !!
Take a peek at my portion of the collaboration !!!

Subscribe to:
Posts (Atom)
Kits & Tuts


Blogs I Love


