About Me
My hobbies are PSP.
I love helping my friends who are starting with PSP.
Any similarity or resemblance to any other tutorial is purely coincidental and unintentional. Pls do not recopy my tutorials anywhere. Many thanks Susan.


Credit

Blinkie created by Rabid Designz. She does some amazing work ! Thanks so much Melissa.

Blinkie created by my long time friend tweety here. Thanks so much my friend :)
My blog was designed By Alika's Scraps. Thanks so much. You did an amazing job !

Leave Me A Message
Followers
My Blog List
Wednesday, September 30, 2009
 The Ghost Train is leaving the station ...
4:52 PM | Posted by
Shal |
 Edit Post
This is, without a doubt, the LARGEST freebie train in history! Over 100 spectacular designers have come together to offer you the BEST Halloween free kits, CU items, Brag Books, and more!
There is sure to be something for everyone! Rather it's for traditional scrapbooking, designing or tagging! So it's just about time to get your snagging fingers ready!!
Pls keep in mind that many of the blogs involved are in different timezones so their portion may not yet be available. So please be patient and remember to leave some love !
This is only my 2nd try at a scrap kit and hope you enjoy what I have created for you.
You may download my part here and then hop onto to another stop.
http://www.pimpyourscrapbook.com/
http://designedbystinaagain.blogspot.com/
http://alyssas-scrapsnsuch.blogspot.com/
http://amysscrapplace.blogspot.com/
http://antisocialdistortions.blogspot.com/
http://artlorsdesignshoppe.blogspot.com/
http://babycakesscraps.blogspot.com/
http://barkingpenguinscraps.blogspot.com/
http://scrappingbits.blogspot.com/
http://blind-sight.org/blog/
http://bluebird-ddu.blogspot.com/
http://cccreationz.blogspot.com/
http://caravan-gypsy.blogspot.com/
http://caysdesigns.blogspot.com/
http://www.charlieonline.it/TheGoodieTrain.htm
http://creative-scraps.blogspot.com/
http://www.coquettasdesignz.blogspot.com/
http://thecountrygirlcreationscabin.blogspot.com/
http://countryhollowcreations.blogspot.com/
http://crazedscreations.blogspot.com/
http://jeanniescreations.blogspot.com/
http://creationzbyjo.blogspot.com/
http://crystalsscrapcreations.blogspot.com/
http://dlitefulaccents-gina.blogspot.com/
http://debscrapbooks.blogspot.com/
http://www.darkpheonixquietcorner.blogspot.com/
http://www.darksistersstore.blogspot.com/
http://www.dazzlingscraps.blogspot.com/
http://pimpmytagswithscraps.com/blog/
http://dolphinlover09.blogspot.com/
http://digiscrapsdezines.blogspot.com/
http://digicats.blogspot.com/
http://digifoxsstudio.blogspot.com/
http://digiscrapations.blogspot.com/
http://digitalblueprint.blogspot.com/
http://digitalcreationsfrommillstreamcottage.blogspot.com/
http://dorthi.blogspot.com/
http://www.dreambigdigi.blogspot.com/
http://ellanoir.blogspot.com/
http://enviedadmiredscraps.blogspot.com/
http://funky-fever.blogspot.com/
http://girlfrienddesignz.blogspot.com/
http://gothicinspirations.blogspot.com/
http://graphicsbypokadot.blogspot.com/
http://heartfeltperfections.blogspot.com/
http://heavensdesignz.blogspot.com/
http://hippiedazescrappinstuff.blogspot.com/
http://hbsfaithinchristscraps.blogspot.com/
http://i-dont-give-a-scrap.blogspot.com/
http://ladyannesscraps.blogspot.com/
http://jbs2designs.blogspot.com/
http://www.jenssweettemptations.blogspot.com/
http://josdzigns.blogspot.com/
http://blueridgemeadows.blogspot.com/
http://saphirasworld.de/scrapdesign/
http://intoxxikatedintentionz.blogspot.com/?zx=d3dfb6da6625ca82
http://www.melindasdesigns.com/
http://melissadanieldesigns.zervona.net/blog/
http://pinkquixotic.blogspot.com/
http://missylynnscrapsandtuts.blogspot.com/
http://momparadisedesigns.blogspot.com/
http://munchkynscraps.com/
http://oceanmystdesigns.blogspot.com/
http://netteandsherrasscraps.blogspot.com/
http://nettesnightowlworks.blogspot.com/
http://turtlesrainbow.blogspot.com/
http://pimp-your-tags.blogspot.com/
http://polkadotscraps.blogspot.com/
http://pspgirlplace.blogspot.com/
http://bitsnpiecesofqbd.blogspot.com/
http://rachelsexpressionz.blogspot.com/
http://scrappersville.blogspot.com/
http://rosemadedesigns.blogspot.com/
http://sassysimagination.blogspot.com/
http://scrapintimenfun.blogspot.com/
http://scrappylippydesigns.blogspot.com/
http://hornyroo.blogspot.com/
http://scrapswithattitude.blogspot.com/
http://scrapzbysashi.blogspot.com/
http://sensualposers.blogspot.com/
http://sevens-scraps.blogspot.com/
http://lifewithshal.blogspot.com/ <<YOU ARE HERE>>
http://irresistiblescraps.blogspot.com/
http://snackpackgu.blogspot.com/
http://staceysdesigns.blogspot.com/
http://stargazer-musings.blogspot.com/
http://freebiefriendsscrapsandmore.blogspot.com/
http://stickykissesdesigns.blogspot.com/
http://sunflower-scraps.blogspot.com/
http://snsdigiscrappers.blogspot.com/
http://tootypupscraps.blogspot.com/
http://www.tracydidit.com/
http://twinkydezines.blogspot.com/
http://tygerstidbits.blogspot.com/
http://whisprddreamz.blogspot.com/
http://whisprddesignz.blogspot.com/
http://wenchdesigns.blogspot.com/
http://www.wickedprincessscraps.blogspot.com/
http://wildfiredezignz.blogspot.com/
http://yourscrapaddiction.blogspot.com/
http://yummiedesigns.blogspot.com/
http://scrapu.blogspot.com/
http://scrappybitoffun.blogspot.com/
http://www.michelles-angels.blogspot.com/
http://sandypiecreations.blogspot.com/
www.pimpmytagswithscraps.com/blog
http://maureenwatlingdesigns.blogspot.com/
http://graphicsbyliz.blogspot.com/
http://chilidesignzz.blogspot.com/
 Playing In The Leaves Tut
4:24 PM | Posted by
Shal |
 Edit Post
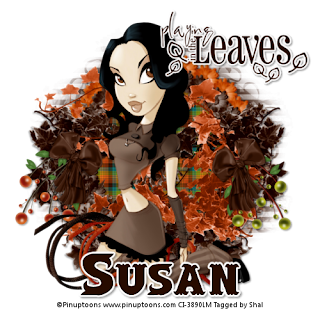
Feel free to use my tutorial as a guide and
have fun giving it your own spin.
This tutorial assumes you have a working knowledge of PSP.
Needed Supplies & Filters :
Tube of Choice .. I am using the adorable work of Pinup Toons which you must have a license to use. Please do not use this work without purchasing through CILM here.
Scrap Kit of Choice .. I have used a gorgeous PTU kit from Bits n Bobs called Early Autumn,
which can be purchased here.
Mask of Choice .. I have used WSL_Mask105
which can be downloaded from her blog here.
Word Art of Chocie .. I have used Autumn Word Art from Cupcake Sprinkles which can be downloaded from her blog here.
Font of Choice .. I have used Base Thanksgiving.
Let's get started !
Open your mask. New image 600x600. Floodfill with white. Select all, copy and paste into selection Paper 5.
New mask layer from image, WSL_Mask105, invert mask data unchecked, and merge group.
Copy and paste Flower Circle 1, resize 90%. Using your magic wand, select the middle portion of your flower circle, selections/modify/expand by 5. Copy and paste Paper 10, selections/invert and hit delete. Select none. Pull this layer below your flower circle layer.
Copy and paste Flower Circle 2, resize 80% and drop shadow. I have used 2/2/40/4 throughout. Drop shadow your other flower circle layer.
Copy and paste Ivy 3 and drop shadow. Position on one the right side of your flower circle layers. Layer duplicate and image mirror.
Copy and paste Ivy 4 and drop shadow. I positioned this layer more towards the centre.
Copy and paste Bow 4, resize 30% and drop shadow. Position this on the side of your frame. Layer duplicate and image mirror.
Copy and paste Ornament 1, resize 50%, image mirror and drop shadow. Position this just below your left side bow layer. Copy and paste Ornament 3, resize 50% and drop shadow. Position this just below your right side bow layer.
Copy and paste Strings 1, resize 75% and drop shadow. Position down on the bottom of your frame on the left side. Copy and paste Strings 4, resize 65% and drop shadow. Position just a lil over your first strings layer.
Copy and paste your tube, resize if necessary and drop shadow.
Copy and paste your chosen word art and resize if necessary. I colorized mine from black to a dark brown to match better. I also added a gradient glow size 3 fat white and drop shadow. Position top right.
X out white background, merge visible.
Open white background, resize to your liking (I used 500x500).
Add copyright & Add your name. I used Base Thanksgiving size 72 dark brown with at the same gradient glow as the word art and then drop shadow.
Save and you are done.
I hope you have enjoyed my tutorial. This kit has many beautiful elements,
so pls feel free to experiment and use my tutorial as a guide.
Please feel free to send me your results.
I'd love to see what you came up with.
Sunday, September 27, 2009
 Friends Make Everything Better Tut
4:39 PM | Posted by
Shal |
 Edit Post
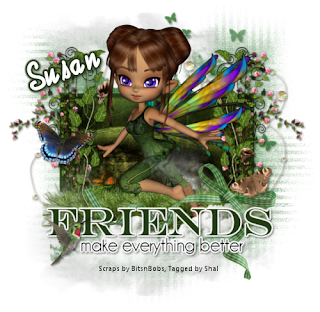 Feel free to use my tutorial as a guide and
have fun giving it your own spin.
This tutorial assumes you have a working knowledge of PSP.
Needed Supplies & Filters :
Scrap Kit of Choice .. I have used a gorgeous PTU kit from Bits n Bobs called Back to Nature,
which can be purchased here.
Tube of Choice .. Part of the Back to Nature kit.
Template of Choice .. I have used Vix Template 11 which can be downloaded from her blog here.
Mask of Choice .. I have used WSL_Mask81
which can be downloaded from her blog here.
Font of Choice .. I have used Sweetness.
Let's get started !
Open your mask & template in PSP. Delete copyright and heart layers.
Copy and paste Paper 10. New mask layer from image, WSL_Mask81, invert mask data unchecked, and merge group.
Copy and paste Tiny butterflies 2, resize 90% and drop shadow. I have used 2/2/40/4 throughout.
Copy and paste Element 6, resize 85% and drop shadow.
Select Rectangle fill layer, select all/float/defloat, copy and paste paper 2, resize 50%, selections invert and hit delete. Select none and delete original rectangle layer.
Select Rectangle frame layer, select all/float/defloat, new raster layer and floodfill with color #253b16. Select non and delete orginal frame layer. Drop shadow frame.
Copy and paste element 7 and drop shadow. Copy and paste Flower 8, resize 65% and drop shadow. Position to the right of your frame. Layer duplicate and mirror.
Copy and paste your tube and drop shadow.
Copy and paste Cloud 1 layer and drop shadow. Position this just below your tube's feet. Layer duplicate and flip. Drag this layer down just below the string bead layer (element6).
Copy and paste ribbon 4, resize 75%, drop shadow and mirror. Position just below your word art layer.
Using your selection tool, select only the FRIENDS part of your word art and colorize with color #235b16. Select none. I added a gradient glow size 3 fat white and drop shadow to my word art.
Copy and paste Butterfly 1 & 3, resize 30% and drop shadow. Copy and paste Element 8, resize 50% and drop shadow. Position these to you liking.
X out white background, merge visible.
Open white background, resize to your liking (I used 500x500).
Add copyright & Add your name. I used Sweetness size 36 white and a gradient glow with #253b16 and then drop shadow.
Save and you are done.
I hope you have enjoyed my tutorial. This kit has many beautiful elements,
so pls feel free to experiment and use my tutorial as a guide.
Please feel free to send me your results.
I'd love to see what you came up with.
Saturday, September 26, 2009
 Coming Soon .. The Ghost Train
3:38 PM | Posted by
Shal |
 Edit Post
If you love Halloween as much as I do, this is one Blog Train you won't want to miss ! The spooktacular Ghost Train .. coming your way October 1!
Mark your calendars, get ready and sit back to download ! Some amazing scrappers are participating in this !
This will only be my 2nd scrap kit, but since I already had a taste and try with Halloween my first time around, I thought I could try it !
Can't wait to see you there !

Mark your calendars, get ready and sit back to download ! Some amazing scrappers are participating in this !
This will only be my 2nd scrap kit, but since I already had a taste and try with Halloween my first time around, I thought I could try it !
Can't wait to see you there !

 Gorjuss Sweet Love Tut
2:43 PM | Posted by
Shal |
 Edit Post
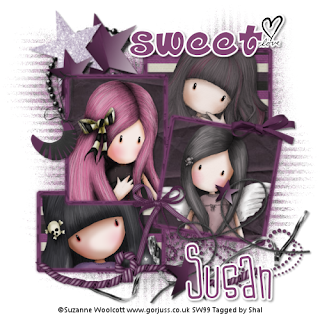
Feel free to use my tutorial as a guide and
have fun giving it your own spin.
This tutorial assumes you have a working knowledge of PSP.
Needed Supplies & Filters :
Tube of Choice .. I am using the work of Suzanne Woolcott which you must have a license to use. Please do not use her work without purchasing through her site here.
Scrap Kit of Choice .. I have used a gorgeous PTU kit from Cora called Tabitha which be purchased here.
Mask of Choice .. I have used WSL_Mask81 Weescotslass which can be downloaded here.
Word Art of choice .. I have used a word art from Missy which can be downloaded here.
Font of Choise .. I have used Jilly Nilly.
Let's get started !
Open your mask in PSP. New image 600x600. Floodfill with white.
Copy and paste Paper 12. New mask layer from image, WSL_Mask81, invert mask data unchecked, and merge group.
Copy and paste Frame 2 and resize 80%. Using your magic wand, select the middle part of one of your frames, selections/modify/expand 5, copy and paste Paper 5, selections/invert, hit delete. Copy and paste your selected tube, delete. Select none. Drop shadow your tube. I have used 2/2/40/4 throughout.
Repeat for each frame area. If you decide to use the same for each frame, then you can start by selecting all frames with your magic wand. I have used Paper 5 for 2 frames and Paper 7 for 2 frames.
Copy and paste Bow 3, resize 35%, mirror and drop shadow. Position between the 2 middle frames.
Copy and paste Bow 1, resize 35% and drop shadow. Position top right hand corner of your top frame.
Copy and paste Chain Swirl, resize 75%, image rotate left 15 and drop shadow. Drag this layer down above your mask layer and position top left hand corner.
Copy and paste Dot Swirl, resize 75% and drop shadow. Drag this layer also just above your mask layer and position bottom right hand corner.
Copy and paste Moon dangle, resize 30% and drop shadow. Position top left corner of your left side frame.
Copy and paste Bow 5, resize 75% and drop shadow. Position bottom of your frames.
Copy and paste ribbon 10, resize 65% and drop shadow. Position bottom of your frames.
Copy and paste Star string, resize 50% and drop shadow. Also position bottom of your frames.
Copy and paste Star 4, resize 65% and drop shadow. Position above your Chain swirl layer. Duplicate and resize 65%. Copy and paste Star 3, resize 65%, drop shadow and position with your other star layer. Arrange your stars in a pattern you like.
Open your word art and delete copyright and background layers. Select the "Sweet" layer. Colorize the layer to match your tubes or kit with your preferred method. I do my colorizing by using adjust/color correction/manual color correction with these settings :

Merge down with your "love layer", resize 50% and copy and paste on your tag. I added a gradient glow size 3 fat white and a drop shadow. Position top right hand corner.
X out white background, merge visible.
Open white background, resize to your liking (I used 500x500).
Add copyright & Add your name. I used Jilly Nilly with the same color as my word art, gradient glow and drop shadow.
Save and you are done.
I hope you have enjoyed my tutorial.
Please feel free to send me your results.
I'd love to see what you came up with.
have fun giving it your own spin.
This tutorial assumes you have a working knowledge of PSP.
Needed Supplies & Filters :
Tube of Choice .. I am using the work of Suzanne Woolcott which you must have a license to use. Please do not use her work without purchasing through her site here.
Scrap Kit of Choice .. I have used a gorgeous PTU kit from Cora called Tabitha which be purchased here.
Mask of Choice .. I have used WSL_Mask81 Weescotslass which can be downloaded here.
Word Art of choice .. I have used a word art from Missy which can be downloaded here.
Font of Choise .. I have used Jilly Nilly.
Let's get started !
Open your mask in PSP. New image 600x600. Floodfill with white.
Copy and paste Paper 12. New mask layer from image, WSL_Mask81, invert mask data unchecked, and merge group.
Copy and paste Frame 2 and resize 80%. Using your magic wand, select the middle part of one of your frames, selections/modify/expand 5, copy and paste Paper 5, selections/invert, hit delete. Copy and paste your selected tube, delete. Select none. Drop shadow your tube. I have used 2/2/40/4 throughout.
Repeat for each frame area. If you decide to use the same for each frame, then you can start by selecting all frames with your magic wand. I have used Paper 5 for 2 frames and Paper 7 for 2 frames.
Copy and paste Bow 3, resize 35%, mirror and drop shadow. Position between the 2 middle frames.
Copy and paste Bow 1, resize 35% and drop shadow. Position top right hand corner of your top frame.
Copy and paste Chain Swirl, resize 75%, image rotate left 15 and drop shadow. Drag this layer down above your mask layer and position top left hand corner.
Copy and paste Dot Swirl, resize 75% and drop shadow. Drag this layer also just above your mask layer and position bottom right hand corner.
Copy and paste Moon dangle, resize 30% and drop shadow. Position top left corner of your left side frame.
Copy and paste Bow 5, resize 75% and drop shadow. Position bottom of your frames.
Copy and paste ribbon 10, resize 65% and drop shadow. Position bottom of your frames.
Copy and paste Star string, resize 50% and drop shadow. Also position bottom of your frames.
Copy and paste Star 4, resize 65% and drop shadow. Position above your Chain swirl layer. Duplicate and resize 65%. Copy and paste Star 3, resize 65%, drop shadow and position with your other star layer. Arrange your stars in a pattern you like.
Open your word art and delete copyright and background layers. Select the "Sweet" layer. Colorize the layer to match your tubes or kit with your preferred method. I do my colorizing by using adjust/color correction/manual color correction with these settings :

Merge down with your "love layer", resize 50% and copy and paste on your tag. I added a gradient glow size 3 fat white and a drop shadow. Position top right hand corner.
X out white background, merge visible.
Open white background, resize to your liking (I used 500x500).
Add copyright & Add your name. I used Jilly Nilly with the same color as my word art, gradient glow and drop shadow.
Save and you are done.
I hope you have enjoyed my tutorial.
Please feel free to send me your results.
I'd love to see what you came up with.
 Boo Tut
12:59 PM | Posted by
Shal |
 Edit Post
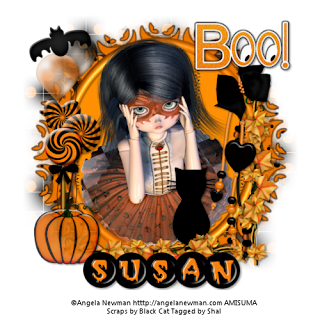
Feel free to use my tutorial as a guide and
have fun giving it your own spin.
This tutorial assumes you have a working knowledge of PSP.
Needed Supplies & Filters :
Tube of Choice .. I am using the work of Angela Newman which you must have a license to use. Please do not use her work without purchasing through AMI here.
Scrap Kit of Choice .. I have used a gorgeous PTU kit from Black Cat called Halloween Mash, which can be purchased at Artistic Minds Inc. here.
Mask of Choice .. I have used WSL_Mask84 Weescotslass which can be downloaded here & Vix_Mask281 which can be downloaded here.
Let's get started !
Open your masks in PSP. New image 600x600. Floodfill with white.
Copy and paste Paper 16. New mask layer from image, WSL_Mask84, invert mask data unchecked, and merge group.
Copy and paste Paper 9. New mask layer from image, Vix_Mask281, invert mask data unchecked, and merge group. Optional .. I have a added a size 3 black gradient glow to this mask layer as well as a drop shadow. I am using 2/2/40/4 throughout.
Copy and paste Frame 8 and reisze 65%.
Using your magic wand, select the middle part of your frame, selections/modify/expand 5, copy and paste paper 13, selections/invert, hit delete. Select none. Drop shadow.
Copy and paste your tube. Drop shadow. Depending on the tube you are using, you may want to erase the bottom part of the tube so it appears to be coming out of the frame.
Copy and paste Swirly ivy, resize 50% and drop shadow. Position on the right side of your frame. Layer duplicate, image rotate left 90 and flip. Position this one towards the bottom just above your frame.
Copy and paste Beads 2, resize 65% and drop shadow. Position just above your ivy layer on the right. Copy and paste Beads 5, resize 65%, mirror and drop shadow. Position just above your other bead layer.
Copy and paste Pearls on bow 2, resize 35% and drop shadow. Position just above your bead layers so it appears the bow is holding them together.
Copy and paste Boo sticker word art and resize 40%. I have added a gradient glow size 3 black and drop shadow. Position top right.
Copy and paste Candy 4, resize 50% and drop shadow. Position on the left side. Copy and paste Candy 2, resize 50%, image rotate right 10 and drop shadow. Position just above your other candy layer. Copy and paste Lollie 1, resize 35% and drop shadow. Position just above your candy layers.
Copy and paste Gummy 1, resize 35% and drop shadow. Position on the left bottom just covering the bottom of your candy and lollie sticks.
Copy and paste Balloon 1, resize 65% and drop shadow. Copy and paste Balloon 2, resize 65% and drop shadow. Drag these layers below your candy and lollie layers. See my image for placement.
Copy and paste Bat, resize 40%, image rotate left 15 and drop shadow. Position top left.
X out white background, merge visible.
Open white background, resize to your liking (I used 500x500).
Add copyright & Add your name. I have decided to use the matching alpha from this kit.
Copy and paste each letter, position and drop shadow.
Save and you are done.
I hope you have enjoyed my tutorial.
Please feel free to send me your results.
I'd love to see what you came up with.
Saturday, September 19, 2009
 New Halloween tags using my scraps
11:21 PM | Posted by
Shal |
 Edit Post
Some gorgeous prezzies using my scraps !
My newest friend Ann, from the Stalker forum used my Scraps during a Tutorial Challenge on the forum to come up with this gem.

Friday, September 18, 2009
 Oriental Dreams Tut
7:02 PM | Posted by
Shal |
 Edit Post
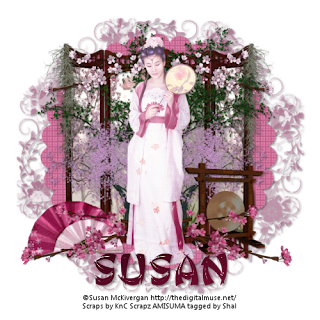
Feel free to use my tutorial as a guide and
have fun giving it your own spin.
This tutorial assumes you have a working knowledge of PSP.
Needed Supplies & Filters :
Tube of Choice .. I am using the work of Susan McKivergan which you must have a license to use. Please do not use her work without purchasing through Up Your Art here. I am licensed through Artistic Minds Inc. but they are now closed.
Scrap Kit of Choice .. I have used a gorgeous PTU kit by KnC Scrapz called Oriental Dreams, which can be purchased at Artistic Minds Inc. here.
Mask of Choice .. I have used BflyFlbyMask23 by Butterfly Flutterby
which can be downloaded here.
Frame of Choice .. I have used one of my own which you can download from here.
Font of Choice .. I am using Ginko.
Filters used .. penta.com (dot and cross).
Let's get started !
Open your mask in PSP. New image 600x600. Floodfill with white.
Select all, new layer, copy and paste into selection paper 4.
New mask layer from image, BflyFlbyMask23, invert mask data unchecked, and merge group. Resize 90% and drop shadow. I have used 2/2/40/4 throughout.
Copy and paste my frame. Select all/float/defloat, new raster layer and floodfill with #c4648d. Select none and delete original frame layer.
Effect Penta.com/dot and cross with settings 72/10/2. Drop shadow.
Copy and paste screen, resize 30% and drop shadow. Image duplicate/mirror. Position both screen layers side to side.
Optional : Depending on the tube you will be using, you could decide to use your freehand selection tool and select the area inside each screen. I then copied and pasted my image that came with my tube and selections/invert delete. You could also choose to floodfill with a matching color.
Copy and paste Spanish Moss, resize 10% and drop shadow. Layer duplicate and mirror. I positioned these in the top corner of my screens.
Copy and paste Tree, resize 50% and drop shadow. Position in the centre of your tag.
Copy and paste Tree 2, resize 30% and drop shadow. Layer duplicate and mirror. I positioned these on either side of my larger green tree.
Copy and paste Fan 1, resize 20%, rotate left 15 and drop shadow. Position bottom left hand side.
Copy and paste Fan 2, resize 15% and drop shadow. Position just a lil over from your other fan.
Copy and paste Gong, resize 30% and drop shadow. Position bottom right hand side.
Copy and paste Cherry Blossom, resize 20%, rotate left 90, and drop shadow. Layer duplicate and mirror. Position your blossom layers towards the bottom on either side.
Copy and paste Cherry Blossom 2, resize 15%, rotate left 90 and drop shadow. Layer duplicate and mirror. Position these blossom layers towards the top on either side.
X out white background, merge visible. Open white background, resize to your liking (I used 500x500).
Add copyright & Add your name. I used Ginko size 60 #790c32. You can add your favorite text effect. I added eye candy/glass and drop shadow.
Save and you are done.
I hope you have enjoyed my tutorial.
Please feel free to send me your results.
I'd love to see what you came up with.
Thursday, September 17, 2009
 Bad Girl Tut
7:30 PM | Posted by
Shal |
 Edit Post
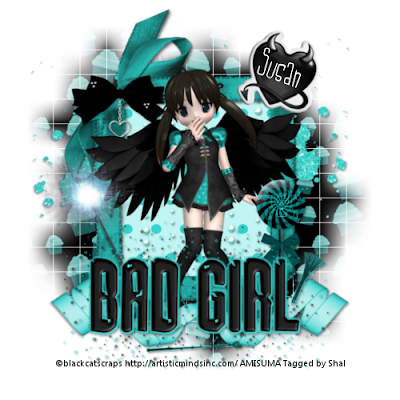 Feel free to use my tutorial as a guide and
have fun giving it your own spin.
This tutorial assumes you have a working knowledge of PSP.
Needed Supplies & Filters :
Scrap Kit of Choice .. I have used a gorgeous PTU kit from Black Cat called Good Girl Gone Bad, which can be purchased at Artistic Minds Inc. here.
Mask of Choice .. I have used WSL_Mask84 Weescotslass which can be downloaded here.
Font of Choice .. I am using Jilly Nilly.
Let's get started !
Open your mask in PSP. New image 600x600. Floodfill with white.
Copy and paste Paper 22. New mask layer from image, WSL_Mask84, invert mask data unchecked, and merge group.
Copy and paste Frame 2, resize 65%, image rotate left 90.
Using your magic wand, select the middle part of your frame, selections/modify/expand 5, copy and paste paper 3 (resize 65%), selections/invert, hit delete. Do not deselect.
Copy and paste bling 1 and hit delete. Select none.
Drop shadow your frame and bling layer. I have used 2/2/40/4 throughout.
Copy and paste bow 8, resize 40%, drop shadow.
I positioned mine over the ribbon bow from the frame.
Copy and paste your tube and drop shadow.
Copy and paste Word Art 2, resize 65% and drop shadow. Position towards the bottom.
Copy and paste Wand, resize 65%, mirror and drop shadow.
Position below your word art layer and on the left side
Copy and paste Lolly, resize 50% and drop shadow.
Position below your word art layer and on the right side.
Copy and paste Ribboncurl 21, resize 65%, rotate left 45 and drop shadow. Position below your word art layer and to one side. Duplicate and image mirror.
Copy and paste Glittersplat 1, resize 65% and drop shadow. Position just above your mask layer and towards the top right. Layer duplicate, image mirror and pull down a bit.
Copy and paste Heartsticker 4, resize 40%, rotate right 20 and drop shadow.
Position top right hand side.
X out white background, merge visible.
Open white background, resize to your liking (I used 500x500).
Add copyright & Add your name. I used JoeHand size 30 white.
Save and you are done.
I hope you have enjoyed my tutorial.
Please feel free to send me your results.
I'd love to see what you came up with.
Tuesday, September 15, 2009
 The Lion & The Lamb Tut
5:35 PM | Posted by
Shal |
 Edit Post
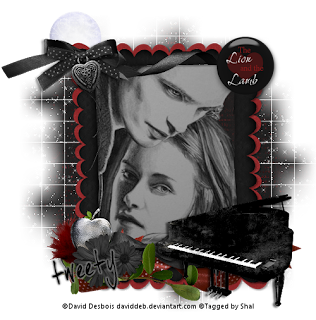
Feel free to use my tutorial as a guide and
have fun giving it your own spin.
This tutorial assumes you have a working knowledge of PSP.
Needed Supplies & Filters :
Scrap Kit of Choice .. I have used a gorgeous PTU kit from Cora called
Her Lullaby, which can be purchased here.
Mask of Choice .. I have used WSL_Mask84 Weescotslass which can be downloaded here.
Tube of Choice .. I am using the work of David Desbois.
Word Art of Choice .. I have used a Twilight button from Missy which can be downloaded at her blog here.
Filters required ... Xenofex (Constellation) & Eye Candy (Gradient Glow) .. both optional
Font of Choice .. I am using JoeHand.
Let's get started !
Open your mask in PSP. New image 600x600. Floodfill with white.
Copy and paste Paper 9. New mask layer from image, WSL_Mask84, invert mask data unchecked, and merge group.
Effects, Xenofex, Constellation, Settings as follows.
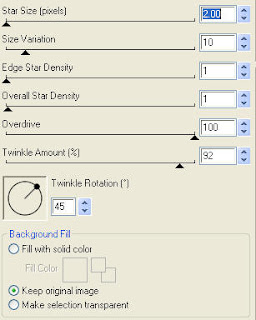 I love adding this lil extra. Adds a lil sparkle hehe.
Copy and paste Frame 5, resize 75%, image rotate left 90.
Using your magic wand, select the middle part of your frame, selections/modify/expand 5, copy and paste paper 4, selections/invert, hit delete. Select none and drag this layer below your frame layer.
Duplicate your frame layer. Resize the original frame layer 105%. Select all/float/defloat, copy and paste paper 7, selections/invert and hit delete.
Drop shadow your frames. I have used 2/2/40/4 throughout.
Copy and paste your tube and drop shadow.
Copy and paste bow 3, resize 40% and drop shadow. Position top left hand corner.
Copy and paste ribbon 2, resize 65%, image/rotate/left 25 and dark shadow.
Position bottom of your frame.
Copy and paste ribbon 3, resize 65% and dark shadow. Position bottom of your frame.
I trimmed a lil bit of the long end of the ribbon.
Copy and paste flower 1, resize 20% and dark shadow. Position bottom left of your frame.
Layer duplicate, resize 65% and move over a bit.
Copy and paste greens 2, resize 40%, image/rotate/right 40 and dark shadow. Position this layer beneath your flower layers.
Copy and paste piano, resize 50% and dark shadow. Position bottom right of your frame.
Copy and paste moon, resize 40%. Position top left side of your frame and pull this layer down to just above your mask layer.
Copy and paste bow charmed 1, resize 30% and drop shadow.
Position top left side above your other bow.
Copy and paste feather, resize 30% and drop shadow. Position under your flower layer.
Copy and paste apple, resize 25% and drop shadow. Position under your flower layers.
X out white background, merge visible.
Open white background, resize to your liking (I used 500x500).
Add copyright & word art of choice.
Add your name .. I used JoeHand size 48 color black and added
a light gray gradient glow and drop shadow.
Save and you are done.
I hope you have enjoyed my tutorial. I have dedicated this tutorial to my good friend tweety. Thanks so much for all your help and support in PSP land and in real life.
Please feel free to send me your results.
I'd love to see what you came up with.
have fun giving it your own spin.
This tutorial assumes you have a working knowledge of PSP.
Needed Supplies & Filters :
Scrap Kit of Choice .. I have used a gorgeous PTU kit from Cora called
Her Lullaby, which can be purchased here.
Mask of Choice .. I have used WSL_Mask84 Weescotslass which can be downloaded here.
Tube of Choice .. I am using the work of David Desbois.
Word Art of Choice .. I have used a Twilight button from Missy which can be downloaded at her blog here.
Filters required ... Xenofex (Constellation) & Eye Candy (Gradient Glow) .. both optional
Font of Choice .. I am using JoeHand.
Let's get started !
Open your mask in PSP. New image 600x600. Floodfill with white.
Copy and paste Paper 9. New mask layer from image, WSL_Mask84, invert mask data unchecked, and merge group.
Effects, Xenofex, Constellation, Settings as follows.
 I love adding this lil extra. Adds a lil sparkle hehe.
Copy and paste Frame 5, resize 75%, image rotate left 90.
Using your magic wand, select the middle part of your frame, selections/modify/expand 5, copy and paste paper 4, selections/invert, hit delete. Select none and drag this layer below your frame layer.
Duplicate your frame layer. Resize the original frame layer 105%. Select all/float/defloat, copy and paste paper 7, selections/invert and hit delete.
Drop shadow your frames. I have used 2/2/40/4 throughout.
Copy and paste your tube and drop shadow.
Copy and paste bow 3, resize 40% and drop shadow. Position top left hand corner.
Copy and paste ribbon 2, resize 65%, image/rotate/left 25 and dark shadow.
Position bottom of your frame.
Copy and paste ribbon 3, resize 65% and dark shadow. Position bottom of your frame.
I trimmed a lil bit of the long end of the ribbon.
Copy and paste flower 1, resize 20% and dark shadow. Position bottom left of your frame.
Layer duplicate, resize 65% and move over a bit.
Copy and paste greens 2, resize 40%, image/rotate/right 40 and dark shadow. Position this layer beneath your flower layers.
Copy and paste piano, resize 50% and dark shadow. Position bottom right of your frame.
Copy and paste moon, resize 40%. Position top left side of your frame and pull this layer down to just above your mask layer.
Copy and paste bow charmed 1, resize 30% and drop shadow.
Position top left side above your other bow.
Copy and paste feather, resize 30% and drop shadow. Position under your flower layer.
Copy and paste apple, resize 25% and drop shadow. Position under your flower layers.
X out white background, merge visible.
Open white background, resize to your liking (I used 500x500).
Add copyright & word art of choice.
Add your name .. I used JoeHand size 48 color black and added
a light gray gradient glow and drop shadow.
Save and you are done.
I hope you have enjoyed my tutorial. I have dedicated this tutorial to my good friend tweety. Thanks so much for all your help and support in PSP land and in real life.
Please feel free to send me your results.
I'd love to see what you came up with.
Wednesday, September 9, 2009
 Xeracx Rocks Tut
9:06 PM | Posted by
Shal |
 Edit Post
have fun giving it your own spin.
This tutorial assumes you have a working knowledge of PSP.
Needed Supplies & Filters :
Tube of Choice .. I am using the work of Ismael Rac which you must have a license to use. I am licensed through Artistic Minds Inc. but they are now closed. You can now find Ismael's artwork licensed through his own store. Pls do not use his work without purchasing through here.
Scrap Kit of Choice .. I have used a gorgeous PTU kit from Black Cat called Good Girl Gone Bad, which can be purchased at Artistic Minds Inc here.
Template of Choice .. I have used a great template from Toxic Desirez Template #2, which can be downloaded on her blog here.
Filters required ... Eye Candy (Gradient Glow)
Font of Choice .. I am using Jilly Nilly.
Let's get started !
Open your mask and template in PSP.
On your template, duplicate and close original.
Delete copyright & musical notes layers and Image/Canvas Size 600x600.
Copy and paste Glitters (note this element has 3 layers, so you would need to use copy merged to get all 3 layers at once). Copy and paste wire mesh 3 and resize 70%. Position these so they fit nicely below your Word Art and once you have your tube in place.
Now we will start filling our template layers. This is the part where you can play with different papers but the technique is the same.
Select Star 1 layer, Select All, Float, Defloat, new raster layer and floodfill with black. Delete original Star 1 layer and select none.
Select Star 2 layer, Select All, Float, Defloart, copy and paste Paper 7, selections invert and delete. Delete original Star 2 layer and select None.
Select Star 3 layer, Select All, Float, Defloart, copy and paste Paper 23, selections invert and delete. Delete original Star 3 layer and select None.
Apply the following to all 3 star layers : Effects Eye Candy/Gradient Glow, Settings Width 3, Fat, White. Add drop shadow. I am using settings 2/2/40/4 throughtout.
Copy and paste whip 5, resize 85%, image flip and rotate right 25. Drop shadow.
Copy and paste your tube and resize as necessary. Drop shadow.
Select Word Art 1 layer, Select All, Float, Defloart, copy and paste Paper 7, selections invert and delete. Delete original Word Art 1 layer and select None.
Select Word Art 2 layer, Select All, Float, Defloart, copy and paste Paper 24, selections invert and delete. Delete original Word Art 2 layer and select None.
Apply previous gradient glow and drop shadow to both Word Art Layers.
Copy and paste Candle 1, resize 30% and drop shadow. Position below your Rocks word art layer.
Copy and paste Candle 5, resize 25% and drop shadow. Position next to your other candle.
Copy and paste Cuffs 2, resize 30% and drop shadow. Position hanging onto your X from your word art layer. Erase part of the chain so it appears to be hanging over the letter X.
Copy and paste Heart Sticker 4, resize 40%, image rotate right 25 and drop shadow.
Position top right hand side.
Copy and paste Ribbon Curl 13, image rotate right 35 and drop shadow. Move this layer down below your tube layer and position to the far left. Layer duplicate and image mirror and move this ribbon layer below the first one.
X out white background, merge visible.
Open white background, resize to your liking (I used 500x500).
Add copyright. Add your name .. I used Jilly Nilly, Size 30 white.
Save and you are done.
I hope you have enjoyed my tutorial.
Please feel free to send me your results.
I'd love to see what you came up with.
Tuesday, September 8, 2009
 Tags using my Halloween Tut & Scraps
1:50 AM | Posted by
Shal |
 Edit Post
Sunday, September 6, 2009
 Too Cute To Spook Tut
7:10 PM | Posted by
Shal |
 Edit Post
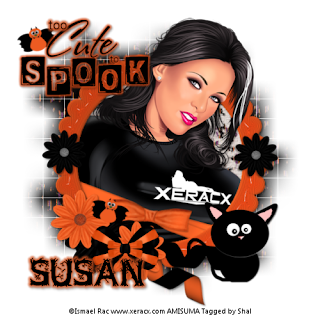
Feel free to use my tutorial as a guide and
have fun giving it your own spin.
This tutorial assumes you have a working knowledge of PSP.
Needed Supplies & Filters :
Tube of Choice .. I am using the work of Ismael Rac which you must have a license to use. I am licensed through Artistic Minds Inc. but they are now closed. You can now find Ismael's artwork licensed through his own store. Pls do not use his work without purchasing through here.
Scrap Kit of Choice .. I have used my very own first lil scrap kit called Happy Halloween and you can download it from my blog here.
Mask of Choice .. I have used WSL_Mask84 which can be downloaded from weescotslass here.
Word Art of Choice .. I have used word art from Caitlin at Cupcake Sprinkles which can be downloaded from her blog here.
Pls note: It's come to my attention after the fact that the word art I originally used has a typo in it. If you choose to use it .. it should read too cute to spook .. rather than to cute to spook.
I added an o in mine.
Filters required ... Eye Candy 4/Gradient Glow (optional)
Font of Choice .. I have used Wild Wood.
Let's get started !
New Image 600x600 and floodfill with white. Open your mask in PSP.
Copy and paste Patterned Paper 5. New mask layer from image, WSL_Mask84, invert mask data unchecked, and merge group.
Copy and paste Frame 2 and resize 90%.
Copy and paste your tube. Duplicate. Move one tube layer beneath your frame layer and keep one above.
Using your magic wand, select the middle part of your frame, selections modify expand by 5. Copy and paste Patterned Paper 1, selections invert and delete. DO NOT DESELECT.
X out the tube layer ABOVE your frame. Select the tube layer that is BELOW your frame layer. Hit delete and select none. Open your other tube layer.
Using your selection tool, draw a rectangle over the bottom portion of your tube (the portion that is longer than your frame and that is over your frame element).
Hit delete and select none. You may need to do this a few times depending on the tube you are using and if you want to remove extra in other areas. The point is to leave the and hair over your frame. Drop shadow your frame. I have used 2/2/40/4 throughout.
Copy and paste flower 5, resize 50% and drop shadow. Position to the bottom left of your frame.
Copy and paste flower 2, resize 40% and drop shadow. Position a lil over your black flower. Layer duplicate, image mirror and position on the right hand side of the black flower.
Copy and paste bow 2, resize 50% and drop shadow. Position a lil bit over your black flower.
Copy and paste bow wrap 2, image rotate left 15 and drop shadow. Drag this layer below your frame layer and erase the portions of the bow wrap peeking out.
Layer duplicate, image mirror, resize 50% and position lower on your frame.
Copy and paste curled ribbon 5, rotate right 65 and drop shadow. Drag this layer below your flower layers.
Copy and paste curled ribbon 2, rotate right 85 and drop shadow. Drag this layer also below your flower layers.
Copy and paste black cat, resize 40% and drop shadow. Position to the bottom right of your frame.
Copy and paste flower 5, resize 30% and drop shadow. Position to the left centre of your frame. Layer duplicate and image mirror.
Copy and paste wordart, resize 60%. I have added a gradient glow, width 5 and color #d34517 and then drop shadow. Position top left of your frame.
Copy and paste bat 2, resize 30%, rotate left 15 and drop shadow. Position just above your word art. Layer duplicate, image mirror and position above your flower cluster on the bottom.
X out white background, merge visible. Open white background, resize to your liking (I used 500x500). Add copyright.
Add your name .. I used Wild Wood, Size 36 color black and added
the same gradient glow as before. Add drop shadow.
Save and you are done.
I hope you have enjoyed my tutorial.
This kit is my first attempt and I do hope you find it usefull.
Pls feel free to experiment and use my tutorial as a guide.
Please feel free to send me your results.
I'd love to see what you came up with.
 Feels Like Autumn
7:16 PM | Posted by
Shal |
 Edit Post
have fun giving it your own spin.
This tutorial assumes you have a working knowledge of PSP.
Needed Supplies & Filters :
Scrap Kit of Choice .. I have used a gorgeous PTU kit from Bits n Bobs called Feels Like Autumn, which can be purchased exclusively at Artistic Minds Inc. here.
Tube of Choice .. I am using the work of Susan McKivergan which you must have a license to use. Please do not use her work without purchasing through Up Your Art here. I am licensed through Artistic Minds Inc. but they are now closed.
Mask of Choice .. I have used WSL_Mask84 which can be downloaded from weescotslass here. Yes I do love this mask.
Filters required ... Xenofex/Constellation and Eye Candy/Gradient Glow (both optional)
Font of Choice .. I have used Jilly Nilly.
Let's get started !
New Image 600x600 and floodfill with white. Open your mask in PSP.
Copy and paste paper 6. New mask layer from image, WSL_Mask84, invert mask data unchecked, and merge group. Image resize 105%
Copy and paste Paper 10. New mask layer from image, WSL_Mask84, invert mask data unchecked, and merge group. Image resize 95%.
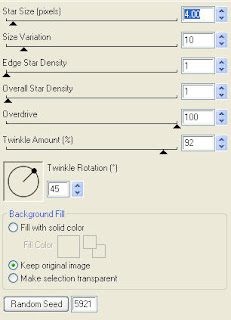
Merge both mask layers together and apply effects/xenofex/constellation
with the following settings.
Copy and paste Frame 3 and image flip. Image rotate/left 25. Center your frame.
Copy and paste your tube and image mirror. Duplicate. Move one tube layer beneath your frame layer and keep one above.
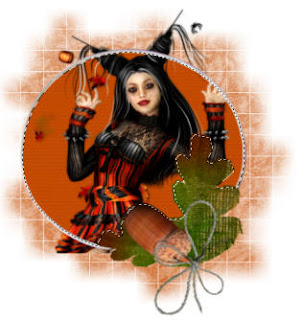
Using your magic wand, select the middle part of your frame, selections modify expand by 3. Copy and paste Paper 1, selections invert and delete. DO NOT DESELECT.
X out the tube layer ABOVE your frame. Select the tube layer that is BELOW your frame layer.
You should have something like this.
 Hit delete and select none. Open your other tube layer.
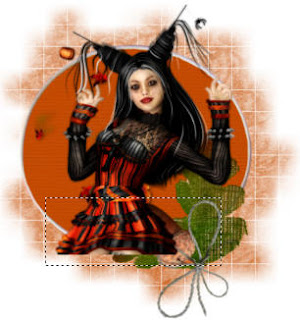
Using your selection tool, draw a rectangle over the bottom portion of your tube (the portion that is longer than your frame and that is over your acord element).
You should have something like this.
 Hit delete and select none.
Select your frame background layer, select all. Copy and paste element 3, resize 85%, invert, delete. I have used 2/2/40/4 throughout. Drop shadow your frame layer.
Copy and paste parcel 4, resize 65% and position above your acorn element. Drop shadow.
Copy and paste brad 4, resize 65% and position above your parcel. Drop shadow.
Copy and paste element 1, resize 65% and position hanging from the left side of your frame.
Drop shadow.
Layer duplicate, resize 65% and mirror. Position a lil lower on the right side of your frame.
Drop shadow.
Copy and paste stars 1, resize 65% and above your last element. Drop shadow.
Copy and paste bow 4, resize 30% and position above your hanging stars. Drop shadow.
Copy and paste element 3, resize 85%. Image mirror/flip, drop shadow and move this layer down just above your mask layer. Layer duplicate and mirror.
Copy and paste element 4, resize 75%. Image flip, drop shadow and move this layer just above your last element layer. Position a lil off centre to the left.
Copy and paste element 3, resize 40%. Image flip and drop shadow.
Position on the bottom left of your frame.
Layer duplicate, image flip and mirror. Move this layer down just above your frame layer.
X out white background, merge visible. Open white background, resize to your liking (I used 500x500).
Add copyright. Add your name .. I used Jilly Nilly, Size 72 color #5b2701 and added
a gradient glow with settings Width 5, Fat, #e2bfa6. Add drop shadow.
Save and you are done.
I hope you have enjoyed my tutorial. This kit has many great elements,
so pls feel free to experiment and use my tutorial as a guide.
Please feel free to send me your results.
I'd love to see what you came up with.

Copy and paste Frame 3 and image flip. Image rotate/left 25. Center your frame.
Copy and paste your tube and image mirror. Duplicate. Move one tube layer beneath your frame layer and keep one above.
Using your magic wand, select the middle part of your frame, selections modify expand by 3. Copy and paste Paper 1, selections invert and delete. DO NOT DESELECT.
X out the tube layer ABOVE your frame. Select the tube layer that is BELOW your frame layer.
You should have something like this.
 Hit delete and select none. Open your other tube layer.
Using your selection tool, draw a rectangle over the bottom portion of your tube (the portion that is longer than your frame and that is over your acord element).
You should have something like this.
 Hit delete and select none.
Select your frame background layer, select all. Copy and paste element 3, resize 85%, invert, delete. I have used 2/2/40/4 throughout. Drop shadow your frame layer.
Copy and paste parcel 4, resize 65% and position above your acorn element. Drop shadow.
Copy and paste brad 4, resize 65% and position above your parcel. Drop shadow.
Copy and paste element 1, resize 65% and position hanging from the left side of your frame.
Drop shadow.
Layer duplicate, resize 65% and mirror. Position a lil lower on the right side of your frame.
Drop shadow.
Copy and paste stars 1, resize 65% and above your last element. Drop shadow.
Copy and paste bow 4, resize 30% and position above your hanging stars. Drop shadow.
Copy and paste element 3, resize 85%. Image mirror/flip, drop shadow and move this layer down just above your mask layer. Layer duplicate and mirror.
Copy and paste element 4, resize 75%. Image flip, drop shadow and move this layer just above your last element layer. Position a lil off centre to the left.
Copy and paste element 3, resize 40%. Image flip and drop shadow.
Position on the bottom left of your frame.
Layer duplicate, image flip and mirror. Move this layer down just above your frame layer.
X out white background, merge visible. Open white background, resize to your liking (I used 500x500).
Add copyright. Add your name .. I used Jilly Nilly, Size 72 color #5b2701 and added
a gradient glow with settings Width 5, Fat, #e2bfa6. Add drop shadow.
Save and you are done.
I hope you have enjoyed my tutorial. This kit has many great elements,
so pls feel free to experiment and use my tutorial as a guide.
Please feel free to send me your results.
I'd love to see what you came up with.
Wednesday, September 2, 2009
 Summer Bride Tut
8:44 AM | Posted by
Shal |
 Edit Post
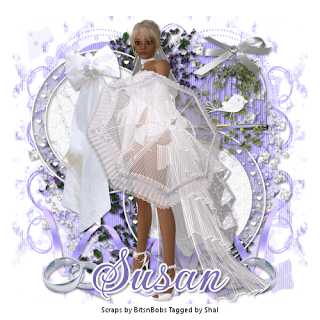
Feel free to use my tutorial as a guide and
have fun giving it your own spin.
This tutorial assumes you have a working knowledge of PSP.
Needed Supplies & Filters :
Scrap Kit of Choice .. I have used a gorgeous PTU kit from Bits n Bobs called Summer Bride,
which can be purchased here.
Tube of Choice .. Part of Summer Bride kit.
Mask of Choice .. I have used BabesDesignz_Mask6
which can be downloaded from her blog here.
Font of Choice .. I have used Gwendolyn Bold.
Let's get started !
New Image 600x600 and floodfill with white. Open your mask in PSP.
New Layer, Select all, Copy and paste into selection Paper 1.
New mask layer from image, BabesDesignz_Mask6, invert mask data checked,
and merge group.
Effects, Texture Effect, Blinds with these settings 3/40 color white.
Copy and paste element 2, resize 85% and drop shadow. I have used 2/2/40/4 throughout.
Copy and paste glitter 1, resize 85% and drop shadow.
Copy and paste glitter 2, resize 75% and drop shadow.
Copy and paste frame 5, resize 65%, layer duplicate. Position one frame top left and other bottom right. See my image for placement.
Using your magic wand, select the middle portion of your frame, selections/modify/expand 3, copy and paste paper 6, selections/invert delete. Move this layer beneath your frame layer. Drop shadow frame. Repeat for your 2nd frame.
Copy and paste bow 1, resize 65%, drop shadow and position to the top of your left side frame.
Copy and paste cage 1, resize 40 percent, drop shadow and position top right side.
Copy and paste streamer 2 image/rotate/free rotate/right 90. Drop shadow and position towards the bottom. Layer duplicate and image mirror.
Copy and paste element 4, resize 40 percent, drop shadow and position bottom left side. Layer duplicate and image mirror.
Copy and paste your tube and drop shadow.
Add copyright.
Add your name .. I used Gwendolyn Bold, Size 72 color #796eb5 and added
a gradient glow with settings Width 3, Fat, White. Add drop shadow.
Save and you are done.
I hope you have enjoyed my tutorial. This kit has many beautiful elements,
so pls feel free to experiment and use my tutorial as a guide.
Please feel free to send me your results.
I'd love to see what you came up with.
Subscribe to:
Posts (Atom)
Labels
- 1$ Mini Kits (4)
- Angela Newman (7)
- Awards (10)
- Blog Trains (6)
- Caron Vinson (1)
- CU Items (8)
- Elias (3)
- Extras (6)
- FTU Scrap Kits (22)
- FTU Tutorials (39)
- Halloween (1)
- Irish Bitch Designs (2)
- KatNKDA (28)
- KiwiFire Storm (1)
- Maigan Lynn (6)
- Misc (1)
- News (98)
- Pinup Toons (1)
- PTU Scrap Kits (79)
- PTU Tutorials (245)
- Sweet Dream Scraps (3)
- Tags Using my Scraps (10)
- Tags Using My Tuts (13)
- Tuts Using My Kits; (63)
- Tuts Using My Kits; Tags Using my Scraps (3)
- verymany (2)
- Wicked Princess Scraps (3)
Blog Archive
-
▼
2009
(107)
-
▼
September
(18)
- The Ghost Train is leaving the station ...
- Playing In The Leaves Tut
- Almost time ... The Ghost Train
- Friends Make Everything Better Tut
- Coming Soon .. The Ghost Train
- Gorjuss Sweet Love Tut
- Boo Tut
- Are you a Twilight fan ?
- New Halloween tags using my scraps
- Oriental Dreams Tut
- Bad Girl Tut
- The Lion & The Lamb Tut
- Xeracx Rocks Tut
- Tags using my Halloween Tut & Scraps
- Too Cute To Spook Tut
- Exciting News !
- Feels Like Autumn
- Summer Bride Tut
-
▼
September
(18)


