About Me
My hobbies are PSP.
I love helping my friends who are starting with PSP.
Any similarity or resemblance to any other tutorial is purely coincidental and unintentional. Pls do not recopy my tutorials anywhere. Many thanks Susan.


Credit

Blinkie created by Rabid Designz. She does some amazing work ! Thanks so much Melissa.

Blinkie created by my long time friend tweety here. Thanks so much my friend :)
My blog was designed By Alika's Scraps. Thanks so much. You did an amazing job !

Sunday, January 31, 2010
 St-Patrick's Day CU Items
2:51 PM | Posted by
Shal |
 Edit Post


Now available as one bundle at Scrappin Warehouse, The Creativity Box, Wilma4ever & Your Scrap Addiction.
Tut using my "On The Wings Of Love" Kit
2:48 PM | Posted by
Shal |
Edit Post

My good friend tweety wrote this gorgeous tutorial using my "On The Wings of Love" scrap kit ! As well this is her 100th tutorial !! Congratulations my friend and thanks so much for the gorgeous tutorial ! You can find it here.
Saturday, January 23, 2010
Valentine CU Items
11:55 PM | Posted by
Shal |
Edit Post
My very first CU items .. just in time for Valentine's !


Elements now available as one bundle at Scrappin Warehouse,The Creativity Box, Wilma4ever & Your Scrap Addiction.
Alphas now available as one bundle at Scrappin Warehouse,The Creativity Box, Wilma4ever & Your Scrap Addiction.
Tuesday, January 19, 2010
Valentine Themed Scrap Kits plus Freebie Mini Kit
5:38 PM | Posted by
Shal |
Edit Post

Love Mini FTU Scrap Kit
I made this lil mini kit to complement my PTU Valentine themed kits. I hope you like it.
This FTU kit has 14 elements, 4 papers and a heart shaped alpha.
You can download it at My Tag Art here.

This Valentine themed kit has 30 papers, 96 elements and 2 heart shaped alphas.

On The Wings of Love PTU Scrap Kit
This Valentine's themed kit has 30 papers & 85 elements.
Currently available at My Tag Art, Scrappin Warehouse, The Creativity Box, Wilma4ever & Your Scrap Addiction.
Monday, January 18, 2010
Crystal Snowflake Tut
5:22 PM | Posted by
Shal |
Edit Post
Feel free to use my tutorial as a guide and
have fun giving it your own spin.
This tutorial assumes you have a working knowledge of PSP.
Needed Supplies & Filters :
Tube of Choice .. I am using the work of KatNKDA which you must have a license to use. Please do not use her work without purchasing through her store here. I am licensed through Artistic Minds Inc. but they are now closed.
Scrap Kit of Choice .. I have used a gorgeous PTU Kit from KatNKDA called Crystal & Snowflake which was purchased through Artistic Minds Inc. who are now closed. The kit is currently unavailable.
Mask of Choice .. I have used WSL_83 which can be downloaded from weescotslass here.
Font of Choice .. I have used Constanza.
Font of Choice .. I have used Constanza.
Filters of Choice .. Dsb Flux/Bright Noise
Let's get started !
Open mask in PSP. New raster layer 600x600 & floodfill with white. Copy and paste Paper 2, new mask layer from image, WSL_83, invert mask data unchecked, and merge group. Copy and paste Paper 1, new mask layer from image, WSL_83, invert mask data unchecked, and merge group. Lower opacity of this layer to 80.
Copy and paste closeup of your tube on one side, layer duplicate and merge down both tube layers. New mask layer from image, WSL_83, invert mask data unchecked, and merge group. Merge all 3 mask layers today and resize 110%.
Copy and paste Overlay 1 & resize 75%. Duplicate layer twice and rename glitter 1, 2 & 3. On your first layer apply DSB Flux/Bright Noise 35%. On your 2nd layer, apply bright noise again, hitting mix twice. On your 3rd layer, apply again hitting mix 3 times. If you decide not to animate your tag, then just skip this part of the tutorial.
Copy and paste Element 10, resize 75% & position towards the bottom. Using your magic wand, select the center portion of your frame, selections modify/expand 3. Copy and paste your tube below your frame layers, selections invert and hit delete. Select none. Copy and paste your tube again but this above your frame layers. Erase the bottom portion of your tube so it appears she is coming out of the frames. Drop shadow your frame. I have used 2/2/40/4 throughout.
Copy and paste Element 41, resize 50%, rotate left 45 & drop shadow. Position on the left side of your frame towards the bottom. Copy and paste Element 40, resize 50%, rotate left 45 & drop shadow. Position next to your other branch.
Copy and paste Element 28, resize 65% & drop shadow. Position bottom centre of your frame. Copy and paste Element 21, resize 50% & drop shadow. Position over the left hand side of your small frame. Copy and paste Cat tube, resize 35%, mirror & drop shadow. Position on the right side of your small frame.
At this point if you need to, resize your tag. I have used 500x500. Add your copyright and name. I have used Constanza 48 color #45567a inside the small frame and rotated just a bit.
If you are choosing not to animate, then you can save your tag.
To animate, close off Glitter Layer 2 & 3 (the lil eye icon in your layer palette), Edit/Copy Merged and paste as new animation in Animation Shop. Close off Glitter Layer 1 and open Glitter Layer 2, Edit/Copy Merged and paste after current frame in AS. Close off Glitter Layer 2 and open Glitter Layer 3, Edit/Copy Merged and paste after current frame in AS. Save as a gif.
To animate, close off Glitter Layer 2 & 3 (the lil eye icon in your layer palette), Edit/Copy Merged and paste as new animation in Animation Shop. Close off Glitter Layer 1 and open Glitter Layer 2, Edit/Copy Merged and paste after current frame in AS. Close off Glitter Layer 2 and open Glitter Layer 3, Edit/Copy Merged and paste after current frame in AS. Save as a gif.
I hope you have enjoyed my tutorial.
Please feel free to send me your results.
I'd love to see what you came up with
Sunday, January 17, 2010
Amazing Valentine Themed Collaboration
12:31 PM | Posted by
Shal |
Edit Post

The gals at Just4Taggers have put together this amazing collaboration just in time for Valentine's Day !
This Chocolate Lovers Collab was put together by some of their very talented designers.
You will get this FREE with any purchase of $10.00 or more.
1. Simply add $10.00 or more worth of products to your shopping cart.
2. Go to check out and it will automatically add the Collab to your cart.
You will get this FREE with any purchase of $10.00 or more.
1. Simply add $10.00 or more worth of products to your shopping cart.
2. Go to check out and it will automatically add the Collab to your cart.
Available at Just4Taggers !
On The Wings of Love Scrap Kit
12:24 PM | Posted by
Shal |
Edit Post
On The Wings of Love PTU Scrap Kit
This Valentine's themed kit has 30 papers & 85 elements.
Currently available at My Tag Art, Scrappin Warehouse, The Creativity Box, Wilma4ever & Your Scrap Addiction.
A New Award
12:20 PM | Posted by
Shal |
Edit Post

Alice from Bright's Kreationz presented me with this adorable award. Thanks so much Alice for thinking of me !
I'm passing this on to :
tweety from tweety's Twilight Tutorials
Cheryl from Brightstar Tutorials
Nikki from Creative Intentionz
Dite from Dite's Haven
Cheryl from Brightstar Tutorials
Nikki from Creative Intentionz
Dite from Dite's Haven
Another tut using my "Love Is In The Air" Kit
12:16 PM | Posted by
Shal |
Edit Post

My dear friend at Dite's Haven wrote this gorgeous tutorial using my Love Is In The Air scrap kit. It's just beautiful. Tutorial can be found here. Thanks so much my friend I just love it !
Wednesday, January 13, 2010
Tut using my "Love Is In The Air" Kit
5:47 PM | Posted by
Shal |
Edit Post

My dearest sweetest oldest friend tweety (small t pls) at tweety's Tutorials wrote this gorgeous tutorial using my "Love Is In The Air" kit ! You can find the tutorial here.
Thank you so much my dearest friend ! Hehe *hides* !
Tuesday, January 12, 2010
Gorgeous Blog Award
6:52 PM | Posted by
Shal |
Edit Post

My good friend Dite from Dite's Haven presented me with this lovely award ! Thanks so much my friend ! I am supposed to pass this on to 5 others ! So here goes !
tweety from tweety's Twilight Tutorials
Cheryl from Brightstar Tutorials
Alice from Bright's Kreationz
Nikki from Creative Intentionz
Patty from Sunspotpp's Place
tweety from tweety's Twilight Tutorials
Cheryl from Brightstar Tutorials
Alice from Bright's Kreationz
Nikki from Creative Intentionz
Patty from Sunspotpp's Place
Monday, January 11, 2010
Tut using my "Love Is In The Air" Kit
3:03 PM | Posted by
Shal |
Edit Post

Imagine my surprise ... Alice from Bright's Kreationz picked up my new Valentine themed kit and wrote this gorgeous tutorial ! I just love what she did with it ! Hop on over to her blog and find the tutorial here. Take a long around .. Alice has some gorgeous works there !
Thanks again Alice .. it's just beautiful .. and thanks for thinking of me !
Saturday, January 9, 2010
Snow Snow Snow Tut
1:47 PM | Posted by
Shal |
Edit Post
Feel free to use my tutorial as a guide and
have fun giving it your own spin.
This tutorial assumes you have a working knowledge of PSP.
Needed Supplies & Filters :
Scrap Kit of Choice .. I have used a gorgeous PTU kit from Monti called Its Snow Time, which can be purchased at Artistic Minds Inc here.
Mask of Choice .. I have used WSL_Mask84 which can be downloaded from weescotslass here.
Filters required ... Xenofex (Constellation) & Vanderlee (Snowflakes)
Font of Choice .. I have used Snowblind.
Let's get started !
New Image 600x600 and floodfill with white. Open your mask in PSP. New raster, select all, copy and paste into selection Paper 5. New mask layer from image, WSL_Mask84, invert mask data unchecked, and merge group. Resize 105%
Duplicate twice and rename layers Mask 1, Mask 2 & Mask 3. On your first mask layer apply the following Constellation :
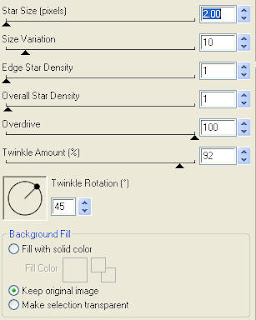 Apply the same Constellation to your next mask layer and hit random once. Apply again to your last mask layer hitting random twice. If you decide not to animate your tag, then just skip the duplicate twice.
Copy and paste Frame-square4, resize 65%, rotate left 10 & position top left hand corner. Layer duplicate and mirror. Position bottom right corner.
Using your magic wand, select the center portion of both your frames (don't forget the lil bits), selections modify/expand 3. If you find it easier, use your freehand selection tool and draw around the areas of both frames. Copy and paste Paper 8 below your frame layer, selections invert and hit delete. Select none. Drop shadow your frames. I used 2/2/40/4 throughout.
Copy and paste Tree 5, resize 40% and drop shadow. Position top left frame. Layer duplicate & move to bottom right frame. Copy and paste Tree 3, resize 30% and drop shadow. Position top left frame next to your other tree. Layer duplicate & move to the bottom right frame next to your other tree there.
Merge down your tree layers and the background layers. Select all. Add the following Vanderlee/snowflakes. Select none.

Copy Snowman-big1, resize 65% & drop shadow. Position in the center.
Copy and paste Fence 5, resize 65% & drop shadow. Position bottom center.
Copy and paste Satin bow 1, resize 50% & drop shadow. Position top left hand corner of your top frame. Copy and paste Mittens 5 below your bow layer, resize 40% and drop shadow. Position so it looks like the mittens are hanging from the bow.
Copy and paste Double bow 16, resize 40% & drop shadow. Position top right hand corner of your bottom frame. Copy and paste Snowflake hanger 1 below your bow layer, resize 30% & drop shadow. Position so it looks like the hanger is hanging from the bow.
Copy and paste Moon red, resize 40%, mirror, rotate left 10 & drop shadow. Position top right hand corner.
Copy and paste Xmas tree 3, resize 30% and drop shadow. Position bottom left hand corner.
At this point if you need to, resize your tag. I have used 500x500. Add your copyright and name. I have used Snowblind size 72 with paper 6 as my background. I then added a size 6 fat white gradient glow as well as drop shadow.
If you are choosing not to animate, then you can save your tag.
To animate, close off Mask Layer 2 & 3 (the lil eye icon in your layer palette), Edit/Copy Merged and paste as new animation in Animation Shop. Close off Mask Layer 1 and open Mask Layer 2, Edit/Copy Merged and paste after current frame in AS. Close off Mask Layer 2 and open Mask Layer 3, Edit/Copy Merged and paste after current frame in AS. Save as a gif.
Save and you are done.
I hope you have enjoyed my tutorial.
Pls feel free to experiment and use my tutorial as a guide.
Please feel free to send me your results.
I'd love to see what you came up with.
Please feel free to send me your results.
I'd love to see what you came up with.
Friday, January 8, 2010
On The Wings of Love Tut
1:43 PM | Posted by
Shal |
Edit Post

Feel free to use my tutorial as a guide and
have fun giving it your own spin.
This tutorial assumes you have a working knowledge of PSP.
Needed Supplies & Filters :
Tube of Choice .. I am using the work of KatNKDA which you must have a license to use. Please do not use her work without purchasing through her store here. I am licensed through Artistic Minds Inc. but they are now closed.
Scrap Kit of Choice .. I have used a gorgeous PTU Kit from KatNKDA called Until We Meet Again which was purchased through Artistic Minds Inc. who are now closed. The kit is currently unavailable.
Mask of Choice .. I have used WSL_84 which can be downloaded from weescotslass here.
Font of Choice .. I have used Constanza.
Let's get started !
Open mask in PSP. New raster layer 600x600 & floodfill with white. Copy and paste Paper 2. New mask layer from image, WSL_84, invert mask data unchecked, and merge group.
New raster, copy and paste into selection element 27 & resize 80%. Drop shadow your frame. I have used 2/2/40/4 throughout.
Copy and paste Element 26, resize 35% & rotate left 15. Using your magic wand, select the middle of your frame. Selections/modify/expand 5. Copy and paste Paper 7, selections invert and hit delete. Select none. Drop shadow.
Copy and paste Element 26, resize 35% & rotate right 90. Using your magic wand, select the middle of your frame. Selections/modify/expand 5. Copy and paste Paper 15, resize 40%, selections invert and hit delete. Do not select.
Copy and paste your tube below your frame layer. Layer duplicate and move this layer above your frame. Hit delete on the tube layer that is below your frame. Select none. Select your tube layer that is above your frame and erase the bottom part so it appears your tube is coming out of the frame. Drop shadow your frame.
Copy and paste Element 02 above your frame layer, resize 30% and drop shadow. Position left hand side of your frame.
Copy and paste element 17, resize 35%, mirror & drop shadow. Position also on the left hand side.
Copy and paste Element 15 above your frame layer, resize 40% twice & drop shadow. Position hanging from the right hand side of your frame. Copy and paste Element 29, resize 20% & drop shadow. Position at the bottom of your chain. Copy and paste Element 20, resize 30% & drop shadow. Position at the top of your chain.
Copy and paste Element 24, resize 65%, rotate right 90 & drop shadow. Position on the left hand side just above your mask layer. Layer duplicate, mirror and resize 90%.
Copy and paste Element 28, resize 65%, rotate right 90 & drop shadow. Position bottom of your frame.
X out white background, merge visible.
Open white background, resize to your liking (I used 500x500).
Add copyright & Add your name. I used Constanza size 72 with Paper 2 as my background. I then added the following gradient glow and then drop shadow.

Save and you are done.
I hope you have enjoyed my tutorial.
Pls feel free to experiment and use my tutorial as a guide.
Please feel free to send me your results.
I'd love to see what you came up with.
Please feel free to send me your results.
I'd love to see what you came up with.
Love Is In The Air PTU Scrap Kit
11:08 AM | Posted by
Shal |
Edit Post
Love Is In The Air PTU Scrap Kit
This Valentine themed kit has 30 papers, 96 elements and 2 heart shaped alphas.
Soon to be available again.
Love Is All You Need Tut
9:04 AM | Posted by
Shal |
Edit Post

Feel free to use my tutorial as a guide and have fun giving it your own spin.
This tutorial assumes you have a working knowledge of PSP.
Needed Supplies & Filters :
Tube of Choice .. I am using the work of Suzanne Woolcott which you must have a license to use. Please do not use her work without purchasing through her site here.
Scrap Kit of Choice .. I have used a gorgeous PTU kit from Wacky Winnie called Berrylicious which can be found on here.
Mask of Choice .. I have used WSL_Mask84 which can be downloaded from weescotslass here.
Font of Choice .. I have used Segoe UI.
Let's get started !
New Image 600x600 and floodfill with white. Open your mask in PSP.
New raster layer, select all and paste into selection Paper 13. New mask layer from image, WSL_Mask84, invert mask data unchecked, and merge group. Resize 110%.
Copy and paste Double frame 1 & resize 60%. Using your magic wand, select the center portion of your right side frame, selections modify/expand 5. Copy and paste Paper 15 below your frame layer, resize 50%, selections invert and hit delete. Do not deselect. Copy and paste your tube and hit delete. Select none. Repeat for left side frame and I used Paper 11. Drop shadow your frame, I have used 2/2/40/4 throughout.
Copy and paste Flower string 2, resize 40% & drop shadow. Position bottom left side of your frame. Layer duplicate & mirror.
Copy and paste Flower 1, resize 50%, rotate right 20 & drop shadow. Position bottom righ hand side of your frame. Copy and paste Flower 3, resize 40%, rotate right 20 & drop shadow. Position above your other flower. Copy and paste Cushion 1, resize 40% and drop shadow. Position over the stems of your flowers.
Copy and paste Heart string 1, resize 35% & drop shadow. Position top left hand corner of your frame. Copy and paste Bow 3, resize 25% and drop shadow. Position above your heart string.
Copy and paste Butterfly 2, resize 65% & drop shadow. Position bottom left hand corner of your frame. Copy and paste Butterfly 5, resize 35%, mirror, rotate left 20 & drop shadow. Position top right hand corner of your frame.
Using your elipse preset shape, color black in your foreground, draw out a large circle shape like this.

New vector layer, text tool Segoe UI, size 32 & color #73253b. Using your mouse, hover over your vector circle shape with your mouse till u see "A" with a curve under. Click now and type out the text you would like. I used "Love is all you need". Object align center of canvas if neccessary, convert to raster layer. Delete circle shape layer. I have added the following gradient glow and drop shadow.

Drag layer just above your mask layer and resize if necessary to fit nicely.
X out white background, merge visible.
Open white background, resize to your liking (I used 500x500).
Add copyright & Add your name. I used the Segoe UI size 60 with the same color and gradient as before.
Open white background, resize to your liking (I used 500x500).
Add copyright & Add your name. I used the Segoe UI size 60 with the same color and gradient as before.
Save and you are done.
I hope you have enjoyed my tutorial.
Please feel free to send me your results.
I'd love to see what you came up with
I'd love to see what you came up with
Wednesday, January 6, 2010
Rac Be My Valentine Tut
9:14 AM | Posted by
Shal |
Edit Post

Feel free to use my tutorial as a guide and have fun giving it your own spin.
This tutorial assumes you have a working knowledge of PSP.
Needed Supplies & Filters :
Tube of Choice .. I am using the work of Ismael Rac which you must have a license to use. I am licensed through Artistic Minds Inc. but they are now closed. You can now find Ismael's artwork licensed through his own store. Pls do not use his work without purchasing through here.
Scrap Kit of Choice .. I have used a gorgeous PTU kit from Fi's Fault called Pink & Black which can be purchased at Artistic Minds Inc. here.
Word Art of Choice .. I have used a great word art from Lori, which is available on her blog here.
Mask of Choice .. I have used WSL_Mask84 which can be downloaded from weescotslass here.
Mask of Choice .. I have used WSL_Mask84 which can be downloaded from weescotslass here.
Font of Choice .. I have used Gwendolyn Bold.
Let's get started !
New Image 600x600 and floodfill with white. Open your mask in PSP.
New raster layer, select all and paste into selection Paper 11. New mask layer from image, WSL_Mask84, invert mask data unchecked, and merge group.
Let's get started !
New Image 600x600 and floodfill with white. Open your mask in PSP.
New raster layer, select all and paste into selection Paper 11. New mask layer from image, WSL_Mask84, invert mask data unchecked, and merge group.
Copy and paste Frame 02 & resize 85%. Using your magic wand, select the center portion of your frame, selections modify/expand 3. Copy and paste Paper 8 below your frame layer, selections invert and hit delete. Do not deselect.
Copy and paste your tube closeup and lower opacity to 70%. Hit delete. Select none. To add a lil sparkle, I have added the following constellation setting to my tube.

Duplicate this tube layer 8 times and rename your layers 1 through 9. We will need change the opacity on each layer so that we can achieve the fading in and out of the tube layer. On layer 1 reduce opacity to 0, layer 2 to 25, layer 3 to 50, layer 4 to 75, layer 5 keep 100, layer 6 to 75, layer 7 to 50, layer 8 to 25 and layer 9 to 0. If you choose not to animate your tag, then skip the duplicate portion.
Drop shadow your frame. I have used 2/2/40/4 throughout.
Copy and paste Candy 01, rotate left 20 and drop shadow. Position bottom right hand corner of your frame. Copy and paste Flower 5 & 6, resize 75% & drop shadow and position with your Candy. Copy and paste Candy 04, rotate right 20 & drop shadow. Position to the right of your candy/flower arrangement. Copy and paste Bow 3, resize 65% & drop shadow. Position in the middle of your arrangement. Copy and paste Flower 1, resize 75% & drop shadow. Position in the middle of your bow.
Copy and paste Bow 7, resize 75% & drop shadow. Position top center of your frame.
Copy and paste just above your frame layer, Beaded wire 1, resize 75% & drop shadow. Position bottom of your frame.
Copy and paste Word art. I have added a size 3 fat white gradient glow and then drop shadow.
At this point if you need to, resize your tag. I have used 500x500. Add your copyright and name. I have used Gwendolyn Bold color #d2448d size 72 with the same gradient glow and drop shadow as the word art.
If you are choosing not to animate, then you can save your tag.
To animate, close off Tube layers 2 through 9 (the lil eye icon in your layer palette), Edit/Copy Merged and paste as new animation in Animation Shop. Close off Tube Layer 1 and open Tube Layer 2, Edit/Copy Merged and paste after current frame in AS. Close off Tube Layer 2 and open Tube Layer 3, Edit/Copy Merged and paste after current frame in AS. Continue in this manner until you have added all 9 to AS.
To animate, close off Tube layers 2 through 9 (the lil eye icon in your layer palette), Edit/Copy Merged and paste as new animation in Animation Shop. Close off Tube Layer 1 and open Tube Layer 2, Edit/Copy Merged and paste after current frame in AS. Close off Tube Layer 2 and open Tube Layer 3, Edit/Copy Merged and paste after current frame in AS. Continue in this manner until you have added all 9 to AS.
You can now modify your frame properties to achieve the speed of animation you like. I have used the following. In AS, edit/select all, animation/frame properties and change to 35. Edit/select none. Then select only Frame 5 by clicking once on it. You will see a blue frame around it to know you have the right one. Animation/frame properties and change to 75.
Save as a gif.
I hope you have enjoyed my tutorial.
Pls feel free to experiment and use my tutorial as a guide.
Please feel free to send me your results.
I'd love to see what you came up with.
I hope you have enjoyed my tutorial.
Pls feel free to experiment and use my tutorial as a guide.
Please feel free to send me your results.
I'd love to see what you came up with.
Tuesday, January 5, 2010
Gorjuss Winter Wonders Tut
12:51 PM | Posted by
Shal |
Edit Post
Feel free to use my tutorial as a guide and
have fun giving it your own spin.
This tutorial assumes you have a working knowledge of PSP.
Needed Supplies & Filters :
Tube of Choice .. I am using the work of Suzanne Woolcott which you must have a license to use. Please do not use her work without purchasing through her site here.
Scrap Kit of Choice .. I have used a gorgeous PTU kit from Cora called Chilly & Willy which be purchased here.
Word Art of Choice .. I have used a great word art from Lori, which is available on her blog here.
Mask of Choice .. I have used Vix's vix_Mask139 which can be downloaded from her blog here.
Font of Choice .. I am using Snowblind.
Filters of Choice .. Vanderlee/Snowflakes
Let's get started !
Open your mask in PSP. New image 600x600 and floofill with white. New raster layer, select all, copy and paste into selection Paper 5. New mask layer from image, Vix_Mask139, invert mask data unchecked, and merge group. Layer duplicate and flip.
Copy and paste Frame 01 & resize 90%. Using your selection tool, select an area similar to this.

Copy and paste Paper 7 below your frame layer, selections invert and hit delete. Select none.
Copy and paste your tube below frame layer in right side window. Resize if necessary. Copy and paste Tree on the left side, resize 85%. Merge down both tube layers and the background layer. Select all, float/defloat.
Layer duplicate twice and rename your layers Snow 1-2-3. Select all/float/defloat. On your first snow layer apply the following Vanderlee/Snowflakes.

Apply the same settings to your next snow layer and randomize. Apply again to your last snow layer hitting and randomize again. Select none. If you decide not to animate your tag, then just skip the duplicate twice and snow steps.
Drop shadow your frame layer. I have used 2/2/40/4 throughout.
Copy and paste Snow, resize 75% & mirror. Position along the bottom of your frame layer & drop shadow.
Copy and paste Penguin 01, resize 75% & drop shadow. Position bottom left hand corner of your frame.
Copy and paste Snow, resize 75% & mirror. Position along the bottom of your frame layer & drop shadow.
Copy and paste Penguin 01, resize 75% & drop shadow. Position bottom left hand corner of your frame.
Copy and paste Ornament 2, resize 35% & drop shadow. Position top left hand corner of your frame. Copy and paste Ribbon 1, resize 35% & drop shadow. Position holding ur ornament.
Copy and paste your selected word art in the left hand side window. Resize so it fits nicely.
At this point if you need to, resize your tag. I have used 525x450. Add your copyright and name. I have used Snowblind size 72 color #6f899a with a white gradient glow size 3 fat and then drop shadow.
If you are choosing not to animate, then you can save your tag.
To animate, close off Snow Layer 2 & 3 (the lil eye icon in your layer palette), Edit/Copy Merged and paste as new animation in Animation Shop. Close off Snow Layer 1 and open Snow Layer 2, Edit/Copy Merged and paste after current frame in AS. Close off Snow Layer 2 and open Snow Layer 3, Edit/Copy Merged and paste after current frame in AS.
In animation shop, select all, frame properties 25. Save as a gif.
Save and you are done.
I hope you have enjoyed my tutorial.
Pls feel free to experiment and use my tutorial as a guide.
Please feel free to send me your results.
I'd love to see what you came up with.
New tutorial site - Tut Stop
9:39 AM | Posted by
Shal |
Edit Post
Have you ever missed the ole Tutorial Hunter site ... well now there's a new place where you can go look at all sorts of tutorials ! It's called Tut Stop and you'll be able to check out some great tutorials .. all neatly organized by theme and by artist ! Take some time and drop on by .. let them know that Shal sent you !

Make sure and check their grand opening contest !!!
Elias Winter Fun Tut
9:17 AM | Posted by
Shal |
Edit Post

Feel free to use my tutorial as a guide and have fun giving it your own spin.
This tutorial assumes you have a working knowledge of PSP.
Needed Supplies & Filters :
Tube of Choice .. I am using the work of Elias Chatzoudis which you must have a license to use. Please do not use his work without purchasing through MPT here.
Scrap Kit of Choice .. I have used a gorgeous PTU kit from BitsnBobs called Winter Dreams which can be purchased here.
Mask of Choice .. I have used WSL_Mask353 which can be downloaded from weescotslass here.
Word Art of Choice .. I have used a great word art from Lori, which is available on her blog here.
Font of Choice .. I have used BD Cartoon Shout.
Let's get started !
New Image 600x600 and floodfill with white. Open your mask in PSP.
New raster layer, select all and paste into selection Paper 10. New mask layer from image, WSL_Mask353, invert mask data unchecked, and merge group. Resize 105%.
Font of Choice .. I have used BD Cartoon Shout.
Let's get started !
New Image 600x600 and floodfill with white. Open your mask in PSP.
New raster layer, select all and paste into selection Paper 10. New mask layer from image, WSL_Mask353, invert mask data unchecked, and merge group. Resize 105%.
Copy and paste Frame 5 & resize 90%. Using your magic wand, select the center portion of your frame, selections modify/expand 8. Copy and paste Paper 9 below your frame layer, resize 75%, selections invert and hit delete. Do not deselect.
Copy and paste your tube below your frame layer, selections invert and hit delete. Select none. Copy and paste your tube again but this time above your frame layers. Erase the bottom portion of your tube so it appears she is coming out of the frames. Drop shadow your frame. I have used 2/2/40/4 throughout.
Copy and paste Bow 6 and drop shadow. Position top right hand corner of your frame. Copy and paste Element 17, resize 50% and drop shadow. Position dangling from the bow. Copy and paste Element 24, resize 65% and drop shadow. Position above the bow.
Copy and paste Element 30 just above your mask layer, resize 75% and position top left hand corner. Layer duplicate and mirror.
Copy and paste Frame 3 just above the snowflake layers, resize 110% & drop shadow.
Copy and paste Element 6 below your frame/wreath layer, drop shadow and position on the left side. Layer duplicate and mirror. Copy and paste Element 5 (also below your frame layer), drop shadow and position on the right side. Layer duplicate and mirror.
Copy and paste Element 44, resize 75% & drop shadow. Position on top of the star from the frame/wreath.
Copy and paste Element 39, resize 50%, image rotate right 20 and drop shadow. Position to the right of your bow. Copy and paste Element 40, resize 50%, image mirror, rotate left 20 and drop shadow. Position a lil higher on the right hand side.
Copy and paste your chosen Word art. Position top left hand corner. I have added a white gradient glow size 3 fat as well as drop shadow.
X out white background, merge visible.
Open white background, resize to your liking (I used 500x500).
Add copyright & Add your name. I used BD Cartoon Shout size 36 color white and added the following gradient glow and then drop shadow.
Open white background, resize to your liking (I used 500x500).
Add copyright & Add your name. I used BD Cartoon Shout size 36 color white and added the following gradient glow and then drop shadow.

Save and you are done.
I hope you have enjoyed my tutorial.
Please feel free to send me your results.
I'd love to see what you came up with.
Subscribe to:
Posts (Atom)
Kits & Tuts


Blogs I Love


