About Me
My hobbies are PSP.
I love helping my friends who are starting with PSP.
Any similarity or resemblance to any other tutorial is purely coincidental and unintentional. Pls do not recopy my tutorials anywhere. Many thanks Susan.


Credit

Blinkie created by Rabid Designz. She does some amazing work ! Thanks so much Melissa.

Blinkie created by my long time friend tweety here. Thanks so much my friend :)
My blog was designed By Alika's Scraps. Thanks so much. You did an amazing job !

Sunday, July 31, 2011
 Gorjuss Forever & Always Tut
11:38 PM | Posted by
Shal |
 Edit Post

Feel free to use my tutorial as a guide and have fun giving it your own spin.
This tutorial assumes you have a working knowledge of PSP.
Needed Supplies :
Tube of Choice .. I am using the work of Suzanne Woolcott which you must have a license to use. Please do not use her work without purchasing through here.
Scrap Kit of Choice .. I have used a gorgeous PTU Kit from A Taggers Scrap "Cafe Society" which can be purchased here.
Mask of Choice .. I haved used WSL_Mask119 which can be downloaded here.
Font of Choice .. Carattere ROB
Let's get started
New image 600x600 and floodfill with white. New raster layer, select all, paste into selection Paper 29. Select none. New mask layer from image, WSL_Mask119, invert transparency unchecked, and merge group. Resize 105%.
Copy and paste Frame 6, resize 85% & drop shadow. I have used 2/2/40/4 throughout.
Copy and paste Deco 4, rotate right 20, resize 75% & drop shadow. Position towards the top. Layer duplicate, mirror & position towards the bottom.
Copy and paste Frame 9 & resize 70%. Using your magic wand, select the center portion of each frame, selections modify/expand 5. Copy and paste Paper 16 below your frame layer, resize 65%, selections invert and hit delete. Select none & drop shadow your frame. Copy and paste Beads just above your background layer & drop shadow.
Copy and paste Deco 3, drop shadow and position on the left hand side of your frame. Copy and paste Flowers 3 & drop shadow. Position bottom left hand corner. Copy and paste Box, resize 65% & drop shadow. Position bottom left hand corner of your frame.
Copy and paste Ribbon 4, resize 75% & drop shadow. Position top right hand corner of your frame. Copy and paste Bow 4, resize 65% & drop shadow. Position top right hand corner of your frame. Copy and paste Chaise, resize 75% & drop shadow. Position bottom right hand corner.
Copy and paste Table, resize 65% & drop shadow. Position bottom right hand corner as well. Copy and paste Teapot, resize 50% & drop shadow. Position on your table.
Copy and paste your tube, resize as necessary and drop shadow.
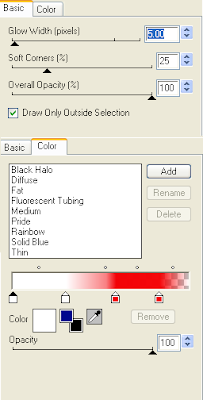
Copy and paste your word art. I then added a size 3 fat white gradient glow & then drop shadow.
X out white background, merge visible. Open white background, resize to your liking (I have used 500x500).
Add copyright and name on your tag. I have used Carattere ROB, size 60, color black and then added the same gradient glow & drop shadow as used on the word art.
Save and you are done.
I hope you have enjoyed my tutorial. Pls feel free to experiment and use my tutorial as a guide.
This tutorial assumes you have a working knowledge of PSP.
Needed Supplies :
Tube of Choice .. I am using the work of Suzanne Woolcott which you must have a license to use. Please do not use her work without purchasing through here.
Scrap Kit of Choice .. I have used a gorgeous PTU Kit from A Taggers Scrap "Cafe Society" which can be purchased here.
Mask of Choice .. I haved used WSL_Mask119 which can be downloaded here.
Font of Choice .. Carattere ROB
Let's get started
New image 600x600 and floodfill with white. New raster layer, select all, paste into selection Paper 29. Select none. New mask layer from image, WSL_Mask119, invert transparency unchecked, and merge group. Resize 105%.
Copy and paste Frame 6, resize 85% & drop shadow. I have used 2/2/40/4 throughout.
Copy and paste Deco 4, rotate right 20, resize 75% & drop shadow. Position towards the top. Layer duplicate, mirror & position towards the bottom.
Copy and paste Frame 9 & resize 70%. Using your magic wand, select the center portion of each frame, selections modify/expand 5. Copy and paste Paper 16 below your frame layer, resize 65%, selections invert and hit delete. Select none & drop shadow your frame. Copy and paste Beads just above your background layer & drop shadow.
Copy and paste Deco 3, drop shadow and position on the left hand side of your frame. Copy and paste Flowers 3 & drop shadow. Position bottom left hand corner. Copy and paste Box, resize 65% & drop shadow. Position bottom left hand corner of your frame.
Copy and paste Ribbon 4, resize 75% & drop shadow. Position top right hand corner of your frame. Copy and paste Bow 4, resize 65% & drop shadow. Position top right hand corner of your frame. Copy and paste Chaise, resize 75% & drop shadow. Position bottom right hand corner.
Copy and paste Table, resize 65% & drop shadow. Position bottom right hand corner as well. Copy and paste Teapot, resize 50% & drop shadow. Position on your table.
Copy and paste your tube, resize as necessary and drop shadow.
Copy and paste your word art. I then added a size 3 fat white gradient glow & then drop shadow.
X out white background, merge visible. Open white background, resize to your liking (I have used 500x500).
Add copyright and name on your tag. I have used Carattere ROB, size 60, color black and then added the same gradient glow & drop shadow as used on the word art.
Save and you are done.
I hope you have enjoyed my tutorial. Pls feel free to experiment and use my tutorial as a guide.
Month Long Back to School Sales at Wilma4ever !!!
10:44 PM | Posted by
Shal |
Edit Post

This month there is an awesome Back to School Sale at Wilma4ever ! Come by and see all the amazing sales that some of the designers have for you for the month of August.
Stop by my store to see all the goodies to be had this month for just .99 cents !
Summer Lovin Tagger Size Kit
6:29 PM | Posted by
Shal |
Edit Post

Summer Lovin Tagger Size Kit
This kit contains 25 papers (800x800 in size) & 71 elements. Elements include bows, lounge chairs, doodles, flairs, frames, pails, ribbons, strings and a variety of summer/beach themed elements that include flowers, palm trees, shells, sea life, beach treats & water toys.
A great kit for those of us who just love summer !
A great kit for those of us who just love summer !
Available now at Heartfelt Perfections, Twilight Scraps & Wilma4ever.
Tuesday, July 26, 2011
Beat the Heat .99 Sale
9:26 PM | Posted by
Shal |
Edit Post

Beat the Heat .99 Sale !
The heat got you trapped in with the AC ?
Visit my stores to take advantage
of this sale till Aug 14th !
The heat got you trapped in with the AC ?
Visit my stores to take advantage
of this sale till Aug 14th !
Stop by Heartfelt Perfections, Twilight Scraps or Wilma4ever !
Sunday, July 24, 2011
Friends Til The End Tut
7:03 PM | Posted by
Shal |
Edit Post

Feel free to use my tutorial as a guide and have fun giving it your own spin.
This tutorial assumes you have a working knowledge of PSP.
Needed Supplies :
Tube of Choice .. I am using the work of Caron Vinson which you must have a license to use. Please do not use her work without purchasing through CDO here. I am licensed through CILM which is now closed.
Scrap Kit of Choice .. I have used a gorgeous PTU Kit from Heartfelt Perfections "Morning Light" which can be purchased here.
Mask of Choice .. I haved used WSL_Mask343 which can be downloaded here.
Word art of Choice .. I have used word art by Lori which can be downloaded here.
Font of Choice .. TheNautiGal
Let's get started
New image 600x600 and floodfill with white. New raster layer, select all, paste into selection Paper 3. Select none. New mask layer from image, WSL_Mask343, invert transparency unchecked, and merge group. Layer duplicate and merge down both mask layers. Resize 110%.
Copy and paste Ribbon 2 & resize 50% twice. Using your magic wand, select the center portion of your frame, selections modify/expand 2. Copy and paste Paper 8 below your frame layer, resize 20%, selections invert and hit delete. Select none & drop shadow your frame. I have used 2/2/40/4 throughout.
Merge down your frame & background layers. Layer duplicate and resize 50%. Position on the left hand side.
Copy and paste Branch 1, resize 40% twice & drop shadow. Position along the top of your frame a little to the right of centre.
Copy and paste Ivy, resize 45% twice, mirror & drop shadow. Position on the right hand side. Layer duplicate & mirror.
Copy and paste your drop. Drop shadow. You may need to move your tube a bit as you add your layers above it.
Copy and paste Yellow floral, resize 45% twice, mirror & drop shadow. Position on the left hand side. Copy and paste Branch, resize 50% twice, flip & drop shadow. Position bottom left hand side.
Copy and paste Floral Branch 2, resize 45% twice, mirror & drop shadow. Position on the right hand side. Copy and paste White Floral, resize 40% twice & drop shadow. Position as well on the right hand side.
Copy and paste Ribbon 3, resize 45% twice & drop shadow. Position along the bottom. Repeat with Ribbon.
Copy and paste Birds, resize 35% twice & drop shadow. Position along the bottom centre.
Copy and paste your word art. Adjust color balance/manual color correction from black to #5cb7aa. Adjust/add remove noise/add noise/uniform monochrome checked/35%. I then added the following gradient glow & drop shadow.

X out white background, merge visible. Open white background, resize to your liking (I have used 500x500).
Add copyright and name on your tag. I have used TheNautiGal, size 72, color #5cb7aa and then added the same noise, gradient glow & drop shadow as used on the word art.
Save and you are done.
I hope you have enjoyed my tutorial. Pls feel free to experiment and use my tutorial as a guide.
No Drama Tut
4:50 PM | Posted by
Shal |
Edit Post

Feel free to use my tutorial as a guide and have fun giving it your own spin.
This tutorial assumes you have a working knowledge of PSP.
Needed Supplies :
Tube of Choice .. I am using the work of verymany which you must have a license to use. Please do not use this work without purchasing through PFD here.
Scrap Kit of Choice .. I have used a gorgeous PTU Kit from Alikas Scraps "No Drama Allowed" which can be purchased here.
Mask of Choice .. I haved used WSL_Mask366 which can be downloaded here.
Font of Choice .. Saginaw Bold
Let's get started
New image 600x400 and floodfill with white. New raster layer, select all, paste into selection Paper 1. Select none. New mask layer from image, WSL_Mask366, invert transparency unchecked, and merge group. Resize 110%.
Copy and paste Element 34, resize 75% & drop shadow. I have used 2/2/40/4 throughout. Copy and paste Element 10, resize 65% and position top left hand corner. Layer duplicate and mirror.
Copy and paste Element 31 & resize 75%. Using your magic wand, select the center portion of your frame, selections modify/expand 3. Copy and paste Paper 4 below your frame layer, resize 75%, selections invert and hit delete. Do not deselect.
Copy and paste Element 15 and position on the left hand side of your background circle. Hit delete, layer duplicate and mirror. Do not deselect yet.
Copy and paste below your frame your tube & resize as necessary. Layer duplicate and drag this layer above your frame. On the tube layer below you frame, hit delete. Select none. Select the tube layer above your frame and erase the bottom portion of the tube so it appears to be coming out of your frame.
Drop shadow your frame.
Copy and paste Element 44, resize 75% & drop shadow. Position along the bottom of your frame. Repeat with Element 43, resizing 65%.
Copy and paste Element 8, resize 65%, rotate left 30 & drop shadow. Position bottom right hand corner of your frame. Copy and paste Element 29, resize 75% & drop shadow. Position on top of your first ribbon.
Copy and paste Element 28 & drop shadow. Position along the bottom of your frame. Repeat with Element 27, resizing 75% & mirror.
Copy and paste Element 49, resize 75% & drop shadow. Position top left hand corner.
X out white background, merge visible. Open white background, resize to your liking (I have used 500x500).
Add copyright and name on your tag. I have used Saginaw Bold, size 60, color #9d3bd9 and then added a size 3 fat white gradient glow and then drop shadow.
Save and you are done.
I hope you have enjoyed my tutorial. Pls feel free to experiment and use my tutorial as a guide.
Monday, July 18, 2011
EMOtionally Yours Collaboration at Twilight Scraps
9:26 PM | Posted by
Shal |
Edit Post


EMOtionally YOURS!! Collaboration
Free with $10 in store purchase
Free with $10 in store purchase
This EMOtionally YOURS!! Collaboration was put together by several very talented designers. There is a total of 24 products inside this collab, mostly all Personal Use kits but there is some Commercial Use pack. Please be sure to read the terms by each designer and read the previews so you know which of the products is PU or CU.
Thank you for supporting Twilight Scraps!!
Thank you for supporting Twilight Scraps!!

Thursday, July 14, 2011
The Fun House Tagger Size Kit
7:31 PM | Posted by
Shal |
Edit Post

The Fun House Tagger Size Kit
This kit contains 30 papers (800x800 in size) & 73 elements. Elements include balloons, bows, flairs, frames, ribbons, strings & star swirls. Also included is an adorable variety of circus themed elements : light string, clowns, ferris wheel, animal cage, roller coaster, hot air balloon, animals (monkey, tiger, lion, elephant, zebra) and a variety of yummy fair goodies to munch on.
A great kit for those of us who always wanted to run away and join the circus !
A great kit for those of us who always wanted to run away and join the circus !
Available now at Heartfelt Perfections, Twilight Scraps & Wilma4ever.
Sunday, July 10, 2011
Tut using my "We're All Superstars" Kit
10:47 AM | Posted by
Shal |
Edit Post

My dearest friend tweety has wrote this gorgeous tutorial for me,
this time using my "We're All Superstars" kit !
She did such a great job .. I didn't recognize my kit at first lol.
Thank you so much my dear friend !
Tutorial can be found here.
Saturday, July 2, 2011
Tut using my "Patriotic Mini Kit"
12:47 AM | Posted by
Shal |
Edit Post

My friend tweety has wrote an amazing tutorial for me,
this time using my Patriotic Mini Kit. This kit is part of the July Thank You Gift at Wilma4ever for any 7.50$ purchase this month.
Thanks so much my dear friend .. amazing job as always.
Tutorial can be found here.
We're All Superstars Tagger Size Kit
12:40 AM | Posted by
Shal |
Edit Post

We're All Superstars Tagger Size Kit
This kit contains 30 papers (800x800 in size) & 72 elements. Elements include bows, disco balls, glass star flairs, frames, guitars, musical notes, ribbons, star spirals, strings and a great assortment of themed elements that include a billboard, microphone & guitar, champagne bottle & glasses, as well as 2 rockin little posers.
A great kit for the superstar in all of us.
A great kit for the superstar in all of us.
Available now at Heartfelt Perfections, Twilight Scraps & Wilma4ever.
Friday, July 1, 2011
Pretty Face Tut
8:06 PM | Posted by
Shal |
Edit Post

Feel free to use my tutorial as a guide and have fun giving it your own spin.
This tutorial assumes you have a working knowledge of PSP.
Needed Supplies :
Tube of Choice .. I am using the work of verymany which you must have a license to use. Please do not use this work without purchasing through PFD here.
Scrap Kit of Choice .. I have used a gorgeous PTU Kit from Clarey called "It Girl" which can be purchased here.
Mask of Choice .. I haved used WSL_Mask284 which can be downloaded here.
Word art of Choice .. I have used Word Art 18 by Brutal Designs which can be downloaded here.
Font of Choice .. Levenim MT
Let's get started
New image 600x400 and floodfill with white. New raster layer, select all, paste into selection Paper 12. Select none. New mask layer from image, WSL_Mask284, invert transparency unchecked, and merge group. Resize 85%.
Copy and paste Scattered Flowers & resize 85%. Adjust/add remove noise/random & monochrome checked/50% and then drop shadow. Position on the right hand side. Layer duplicate & mirror.
Copy and paste Scalloped Frame 2 & resize 75%. Using your magic wand, select the center portion of your first frame, selections modify/expand 5. Copy and paste Paper 1 below your frame layer, selections invert and hit delete. Select none and drop shadow your frame.
Copy and paste Ribbon 1, resize 75% & drop shadow. Position at the top of your frame. Repeat with Ribbon 3, resizing 65% & mirror.
Copy and paste Wired Hearts, resize 75% & drop shadow. Position on the top left hand side of your frame. Repeat with Wired Flower 1, mirror and position on the right hand side.
Copy and paste your tube. Resize as necessary.
Copy and paste Scattered Flowers 2, resize 75% & drop shadow. Position along the bottom. Repeat with Crystal Swirl 2 and String of hearts.
Copy and paste Flower 1, resize 75% & drop shadow. Position bottom right hand corner. Repeat with Flower 2, resizing 65% & position next to your first flower.
Copy and paste Mascara, resize 75% & drop shadow. Position bottom left hand corner. Copy and paste Lipstick, drop shadow and position next to the mascara.
Open your word art in Psp and delete credit layer. Select Layer and adjust color balance/manual color correction from #c605f4 to #bf1849. Merge visible. Copy and paste on your tag. Position top left hand corner.
X out white background, merge visible. Open white background, resize to your liking (I have used 500x500).
Add copyright and name on your tag. I have used Levenim MT, Size 48, color black and then added a size 3 fat white gradient glow & drop shadow.
Save and you are done.
I hope you have enjoyed my tutorial. Pls feel free to experiment and use my tutorial as a guide.
July Thank You Gift at Wilma4ever !
7:00 PM | Posted by
Shal |
Edit Post

JULY 2011 Thank You Gift!
The fabulous designers at Wilma4ever have gotten together to create this fabulous mix of items that are CU/PU/S4H/S4O that will help you create a wonderful layout or fabulous product. When you purchase $7.50 worth of items in the shop you can add this wonderful gift to your cart for FREE. Come check it out!
You can find the gift HERE in the store.

Miss USA Tut
6:24 PM | Posted by
Shal |
Edit Post

Feel free to use my tutorial as a guide and have fun giving it your own spin.
This tutorial assumes you have a working knowledge of PSP.
Needed Supplies :
Tube of Choice .. I am using the work of Michael Landefeld which you must have a license to use. Please do not use this work without purchasing through CDO here. I am licensed through CILM which is now closed.
Scrap Kit of Choice .. I have used a gorgeous PTU Kit from Bello Scarto called "Lil Miss USA" which can be purchased here.
Mask of Choice .. I haved used WSL_Mask215 which can be downloaded here.
Font of Choice .. Impact & TheNautiGal
Let's get started
New image 600x600 and floodfill with white. New raster layer, select all, paste into selection Paper 9. Select none. New mask layer from image, WSL_Mask215, invert transparency unchecked, and merge group. Repeat using Paper 16 and resize 85%.
Copy and paste Element 3, resize 65% & drop shadow. I have used 2/2/40/4 throughout. Position top left hand corner. Repeat with Element 2 and position top right hand corner.
Copy and paste Element 29 and resize 85%. Using your magic wand, select the center portion of both frames, selections modify/expand 5. Copy and paste Paper 16 below your frame layer, resize 65%, selections invert and hit delete. Select none. Drop shadow your frame.
Copy and paste Element 6 & drop shadow.
Copy and paste Element 43, resize 50% & drop shadow. Position at the top of your star frame.
Copy and paste Element 14, resize 50% & drop shadow. Position on the right hand side. Repeat with 13 and position next to your first balloon.
Copy and paste Element 30, resize 50% & drop shadow. Position hanging from your frame on the left hand side.
Copy and paste your tube, resize as necessary & drop shadow.
X out white background, merge visible. Open white background, resize to your liking (I have used 500x500).
Add copyright and name on your tag.
For the Word Art, I used Impact, Size 65, Paper 16 as the background color #388600 to type out "Miss USA". I then added the following gradient glow and drop shadow.
For the name, I used TheNautiGal, Size 72, Color #fd0404 and then added a noise effect (Adjust/add remove noise/random & monochrome checked/75%) and a size 5 fat white gradient glow and then drop shadow.
Save and you are done.
I hope you have enjoyed my tutorial. Pls feel free to experiment and use my tutorial as a guide.
This tutorial assumes you have a working knowledge of PSP.
Needed Supplies :
Tube of Choice .. I am using the work of Michael Landefeld which you must have a license to use. Please do not use this work without purchasing through CDO here. I am licensed through CILM which is now closed.
Scrap Kit of Choice .. I have used a gorgeous PTU Kit from Bello Scarto called "Lil Miss USA" which can be purchased here.
Mask of Choice .. I haved used WSL_Mask215 which can be downloaded here.
Font of Choice .. Impact & TheNautiGal
Let's get started
New image 600x600 and floodfill with white. New raster layer, select all, paste into selection Paper 9. Select none. New mask layer from image, WSL_Mask215, invert transparency unchecked, and merge group. Repeat using Paper 16 and resize 85%.
Copy and paste Element 3, resize 65% & drop shadow. I have used 2/2/40/4 throughout. Position top left hand corner. Repeat with Element 2 and position top right hand corner.
Copy and paste Element 29 and resize 85%. Using your magic wand, select the center portion of both frames, selections modify/expand 5. Copy and paste Paper 16 below your frame layer, resize 65%, selections invert and hit delete. Select none. Drop shadow your frame.
Copy and paste Element 6 & drop shadow.
Copy and paste Element 43, resize 50% & drop shadow. Position at the top of your star frame.
Copy and paste Element 14, resize 50% & drop shadow. Position on the right hand side. Repeat with 13 and position next to your first balloon.
Copy and paste Element 30, resize 50% & drop shadow. Position hanging from your frame on the left hand side.
Copy and paste your tube, resize as necessary & drop shadow.
X out white background, merge visible. Open white background, resize to your liking (I have used 500x500).
Add copyright and name on your tag.
For the Word Art, I used Impact, Size 65, Paper 16 as the background color #388600 to type out "Miss USA". I then added the following gradient glow and drop shadow.

For the name, I used TheNautiGal, Size 72, Color #fd0404 and then added a noise effect (Adjust/add remove noise/random & monochrome checked/75%) and a size 5 fat white gradient glow and then drop shadow.
Save and you are done.
I hope you have enjoyed my tutorial. Pls feel free to experiment and use my tutorial as a guide.
Subscribe to:
Comments (Atom)
Kits & Tuts


Blogs I Love


